GradeLens User Documentation
AI-Powered Auto-Grading Platform · Version 1.0
Table of Contents
1. Landing Page Overview
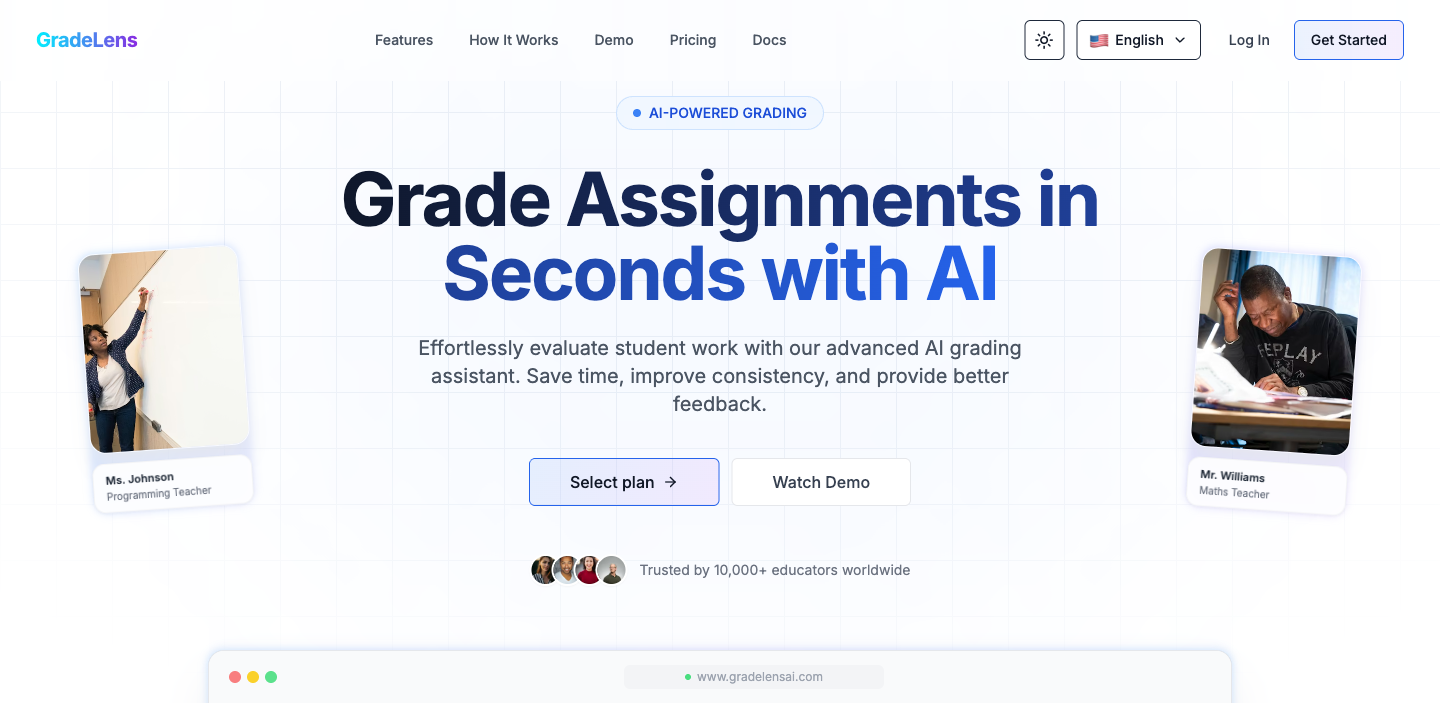
When you visit gradelensai.com, you land on the home page which introduces the platform and its key capabilities.
Navigation Bar
The top navigation bar contains:
| Item | Description |
|---|---|
| GradeLens (logo) | Returns to the home page |
| Features | Jumps to the features section |
| How It Works | Jumps to the step-by-step guide |
| Demo | Jumps to the interactive demo |
| Pricing | Jumps to the pricing calculator |
| Docs | Opens the documentation site |
| Theme toggle | Switch between light and dark mode |
| Language selector | Change the interface language |
| Log In | Go to the authentication page |
| Get Started | Go to the authentication page |
Hero Section
The hero section highlights the core value proposition:
- Headline: Grade Assignments in Seconds with AI
- Subtext: Effortlessly evaluate student work with advanced AI. Save time, improve consistency, and provide better feedback.
- Select plan → — navigates to the auth/pricing page
- Watch Demo — scrolls to the interactive demo section
- Social proof: Trusted by 10,000+ educators at universities including Korea University, Seoul National University, Harvard, MIT, Stanford, Oxford, and more.
How GradeLens Works
A four-step process overview:
- Upload Assignments — Upload student work in text, PDF, or image format.
- AI Evaluation — The AI analyzes content and scores it against your rubric.
- Review & Share — Review AI suggestions, make adjustments, and share results.
- Detailed Feedback — Get AI-generated feedback for each student.
Interactive Demo
Click "Grade This Essay" to see a live demonstration of AI grading on a sample student essay.
Pricing Calculator
Select a plan and enter the number of expected students to calculate your monthly cost.
Footer
- Product: Features, Pricing, Demo, How It Works
- Company: Contact
- Resources: Documentation, Support
- © 2025 GradeLens. All rights reserved.
2. Authentication
2.1 Login Options
Navigate to the auth page by clicking Log In or Get Started from the landing page.
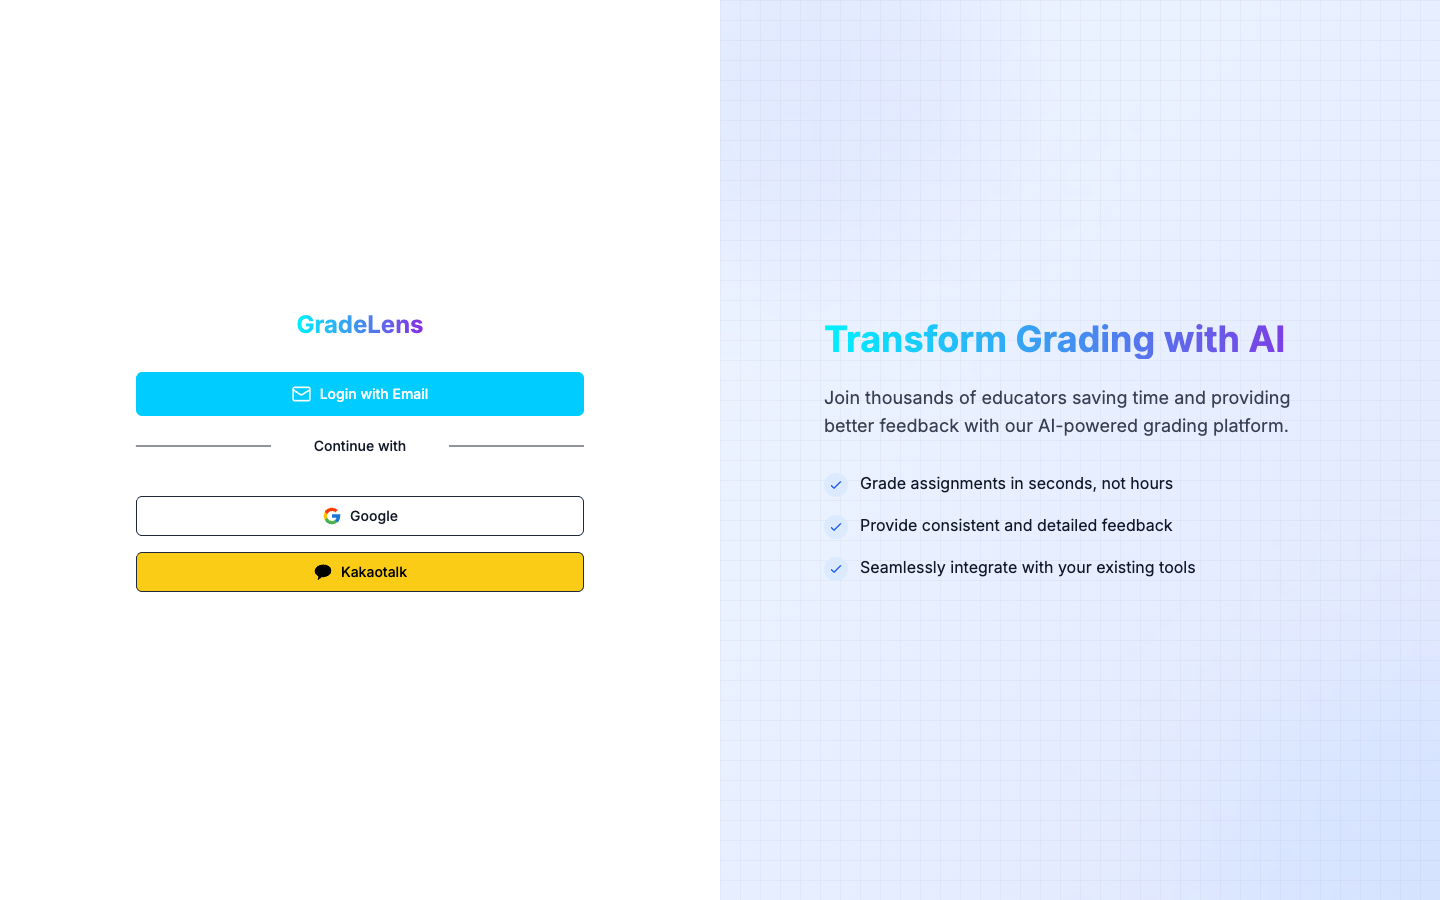
You have three ways to sign in:
| Option | Description |
|---|---|
| Login with Email | Passwordless login via a 6-digit verification code sent to your email |
| Sign in with your Google account | |
| Kakaotalk | Sign in with your Kakao account |
2.2 Login with Email
Click Login with Email. A modal will appear asking for your email address.
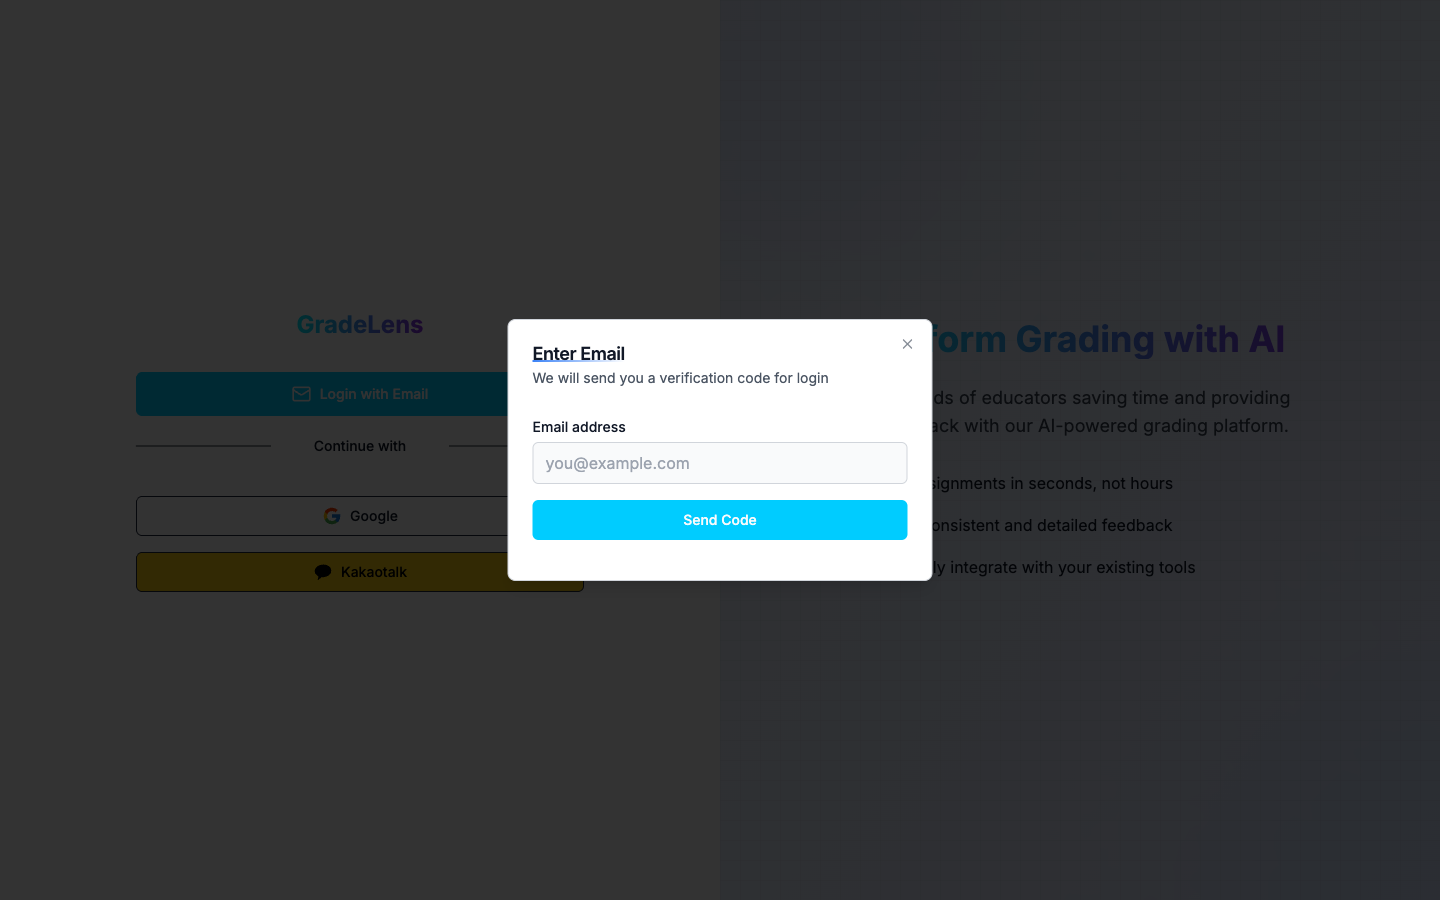
- Enter your email address in the Email address field.
- Click Send Code.
- A confirmation toast — "Verification code sent to your email" — will appear.
Tip: If you entered the wrong email, you can click Change Email on the next screen to go back.
2.3 Verify Your Code
After sending the code, the modal switches to the Code Verification screen.
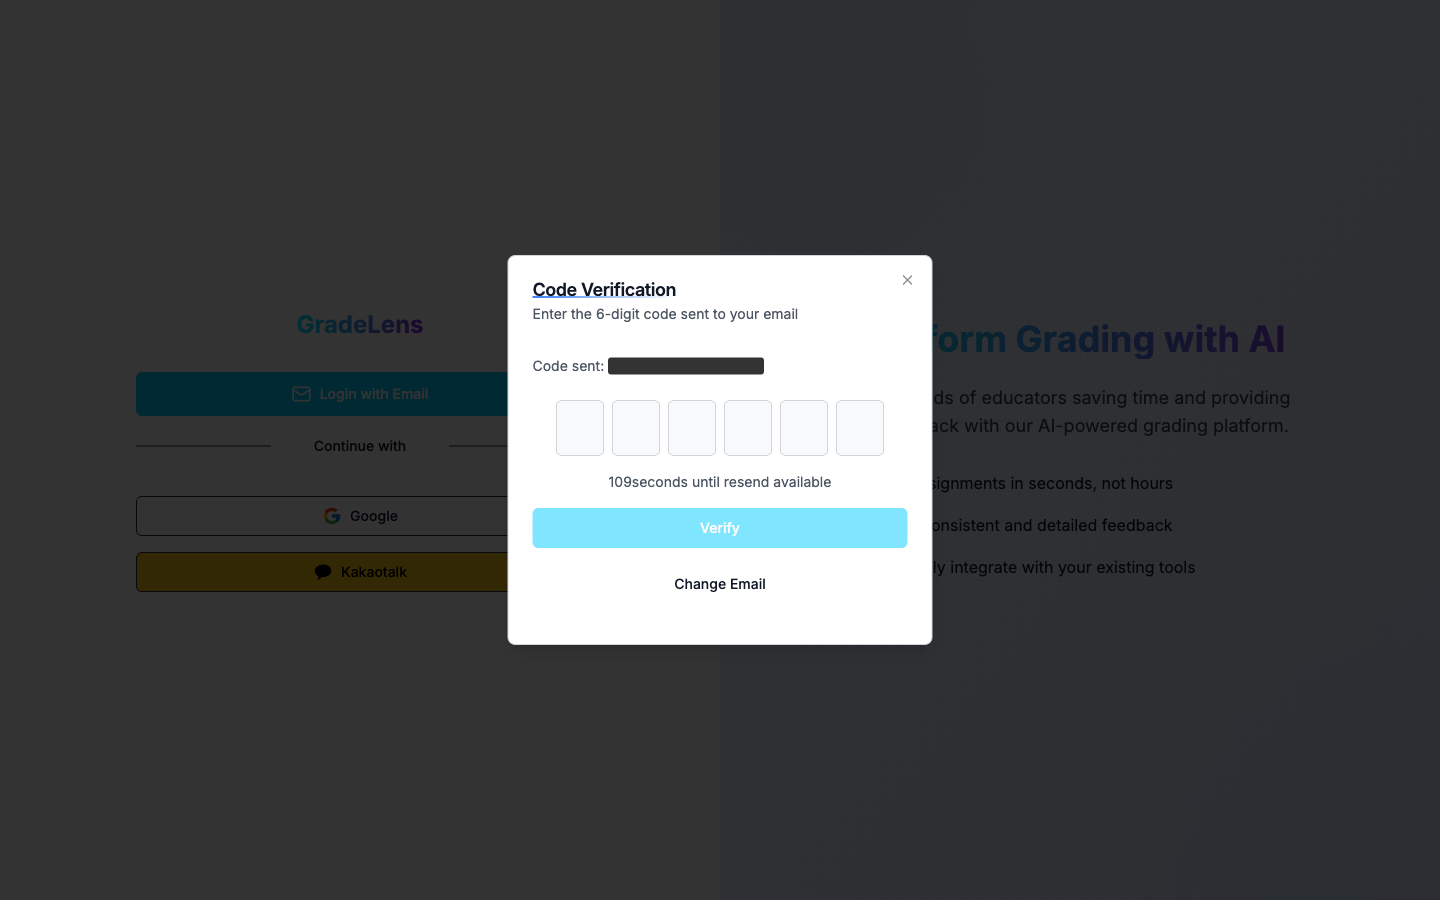
- Check your inbox for a 6-digit code.
- Enter each digit in the six input boxes.
- Click Verify to log in.
Note: The Verify button is enabled only after all 6 digits are entered. The code expires and a resend option becomes available after 120 seconds.
2.4 Social Login (Google / Kakao)
- Click Google to be redirected to Google's sign-in flow.
- Click Kakaotalk to be redirected to Kakao's sign-in flow.
After completing the OAuth flow, you will be returned to GradeLens automatically.
2.5 Terms of Use
On first login, a Terms of Use dialog appears.
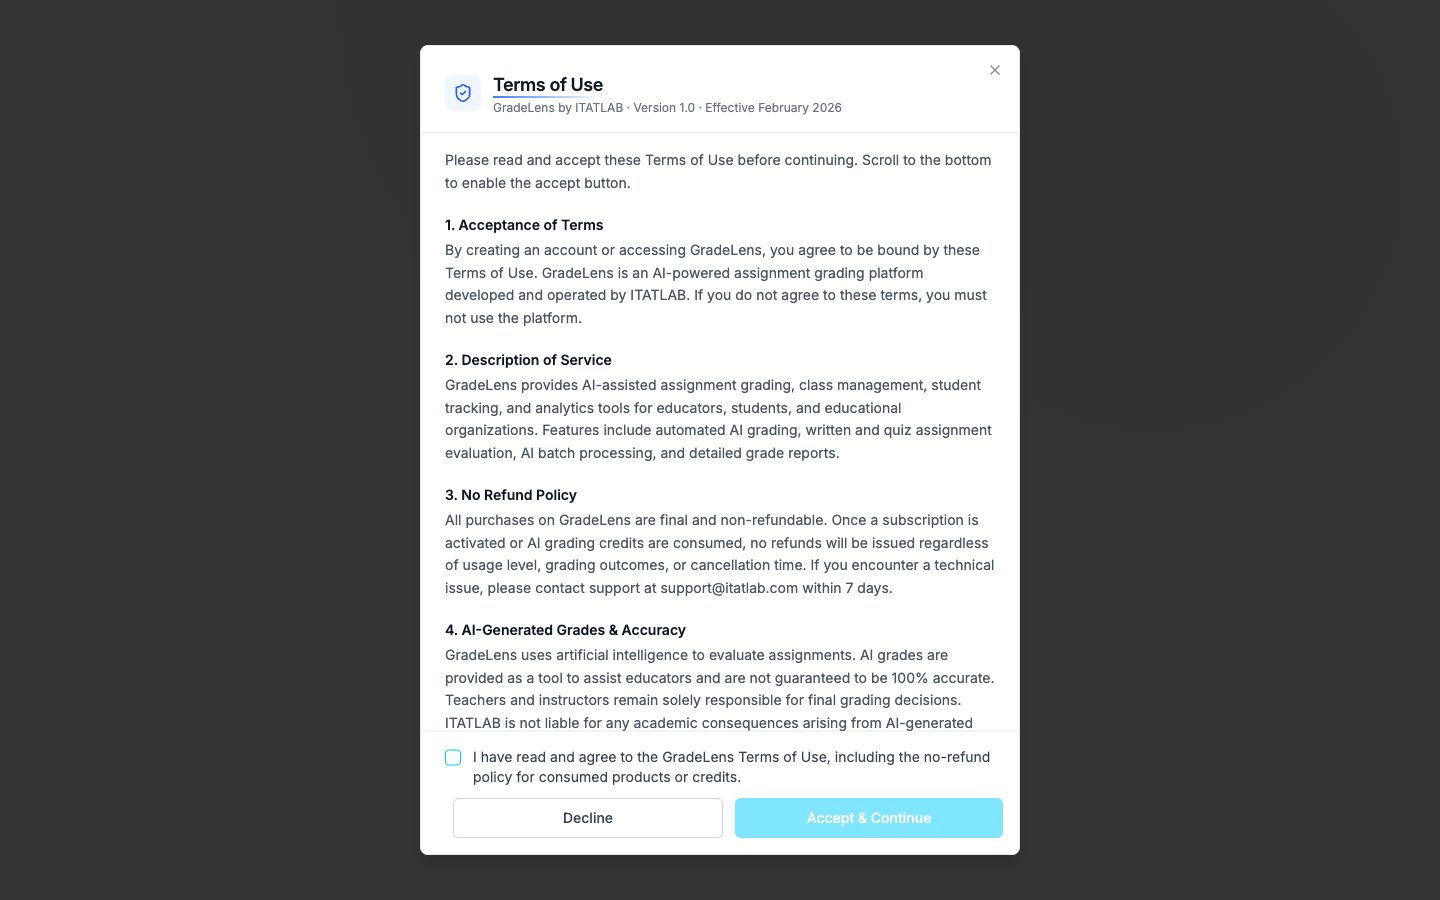
- Read through all 12 sections (Acceptance of Terms, No Refund Policy, AI Accuracy, Privacy, etc.).
- Scroll to the bottom to activate the Accept & Continue button.
- Check the box: "I have read and agree to the GradeLens Terms of Use, including the no-refund policy for consumed products or credits."
- Click Accept & Continue to proceed.
Clicking Decline will prevent access to the platform.
2.6 Select Your Role
After accepting the Terms, you are taken to the "Continue as" screen.
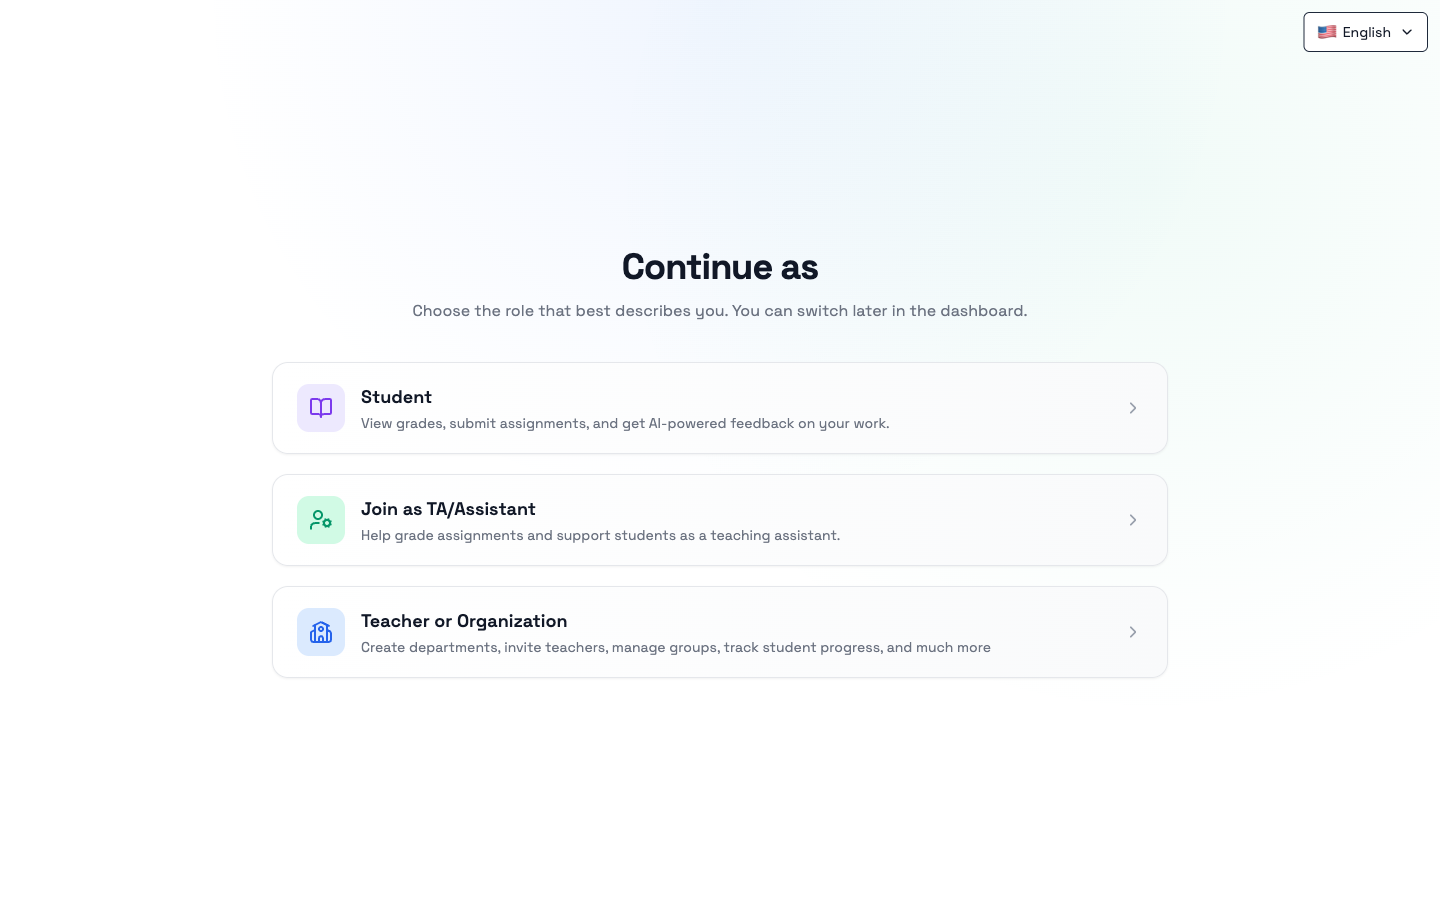
Choose the role that best describes you:
| Role | Description |
|---|---|
| Student | View grades, submit assignments, and get AI-powered feedback on your work. |
| TA / Assistant | Help grade assignments and support students as a teaching assistant. |
| Teacher or Organization | Create departments, invite teachers, manage groups, track student progress, and more. |
Note: You can switch your role later from the dashboard settings.
3. Teacher Portal
After selecting the Teacher or Organization role, you are directed to the Teacher Portal — the central hub for managing your classes, assignments, and students.
3.1 Dashboard (Overview)
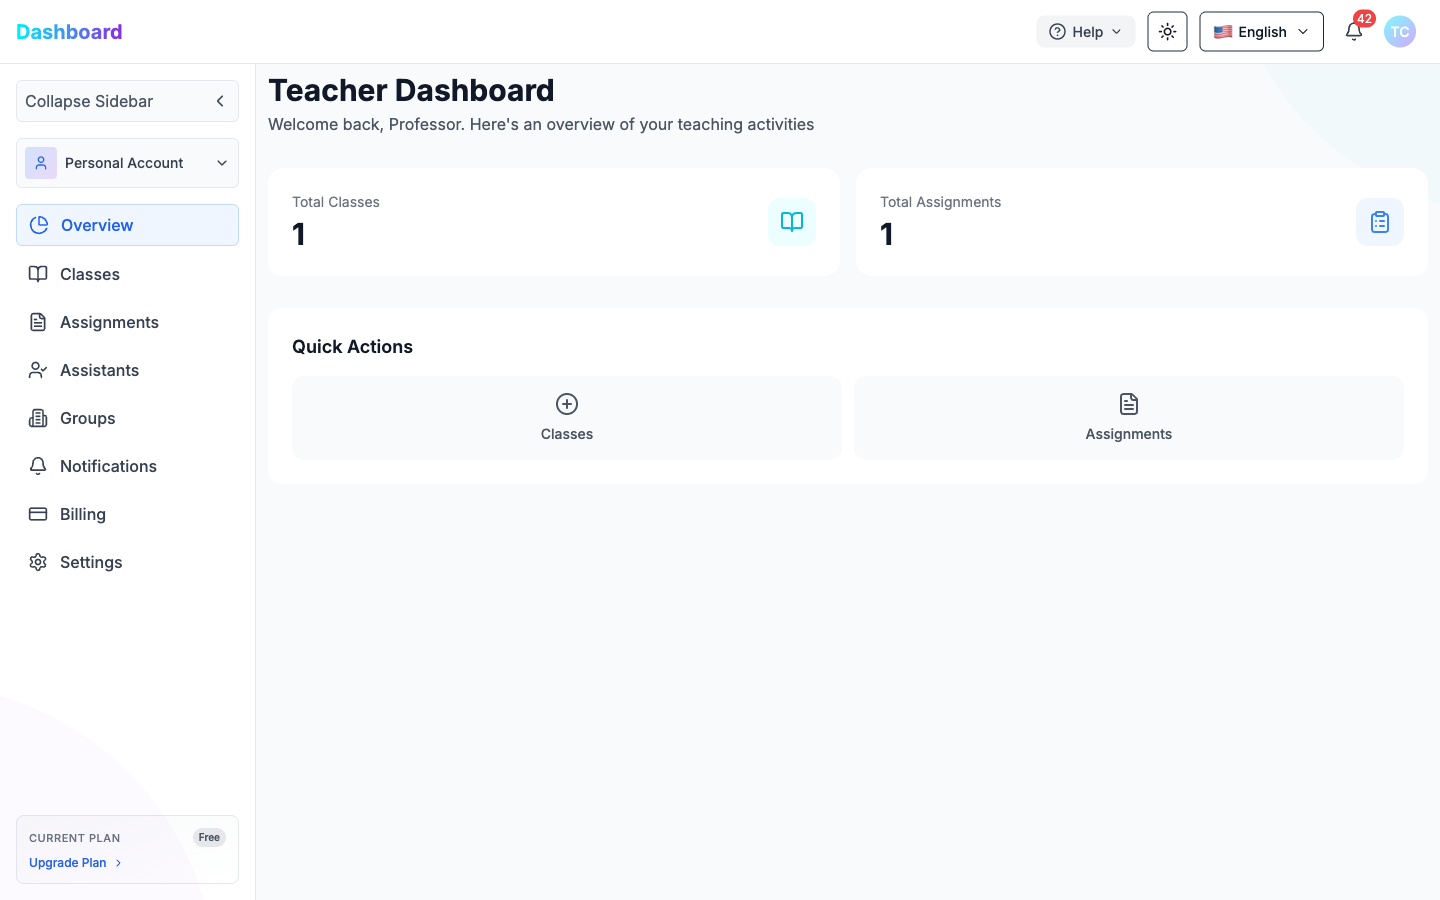
The Overview page shows a summary of your teaching activity:
| Card | Description |
|---|---|
| Total Classes | Number of classes you have created |
| Total Assignments | Number of assignments created across all classes |
Quick Actions at the bottom let you jump directly to:
- Classes — Create or manage a class
- Assignments — Create or manage an assignment
3.2 Classes
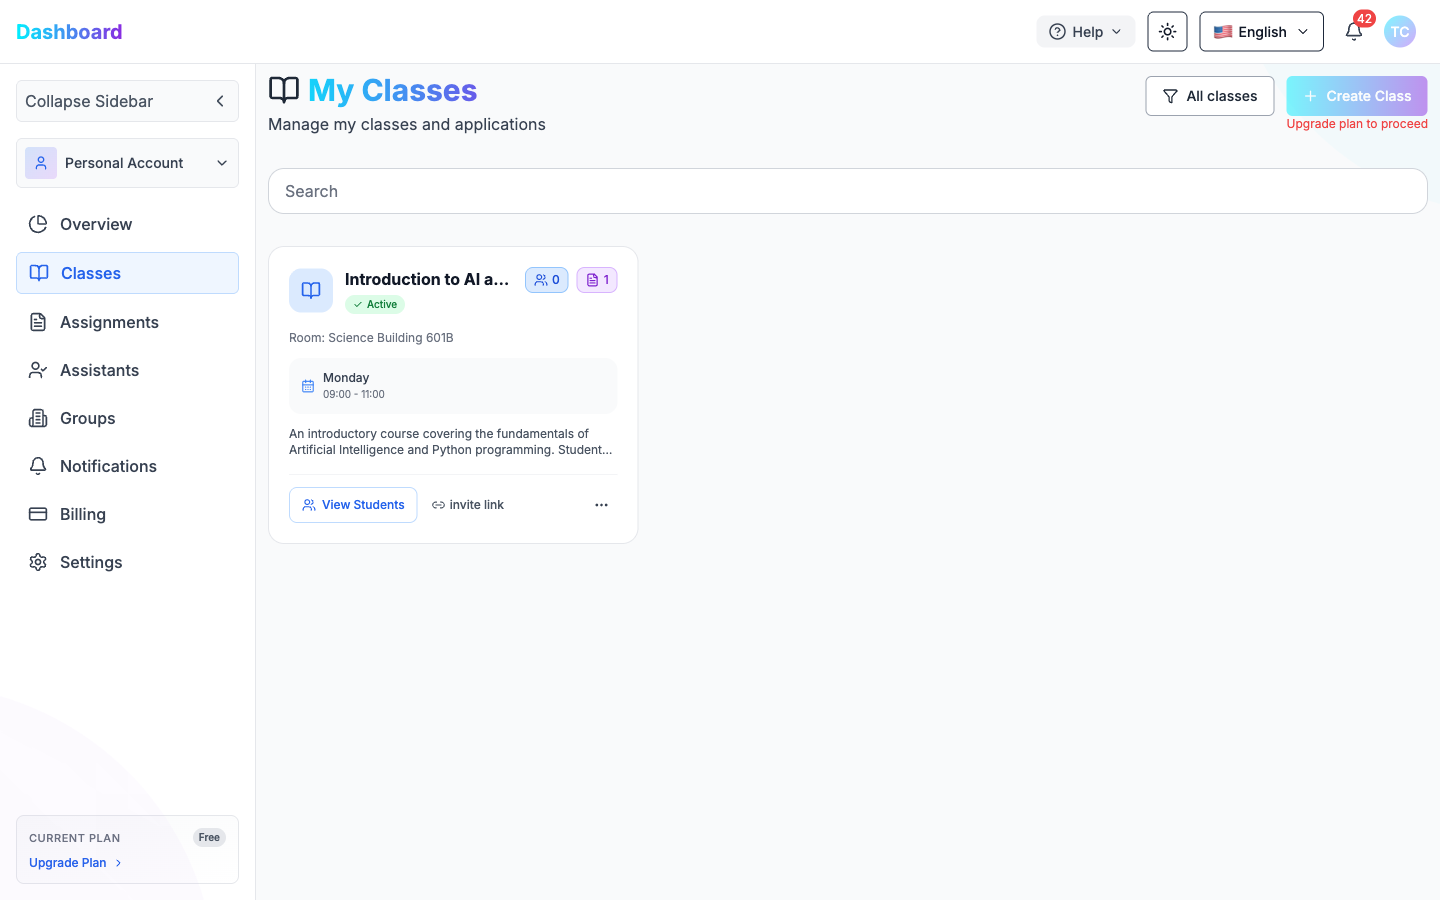
Navigate to Classes in the sidebar to view all your classes.
Each class card displays:
- Class name and status badge (Active)
- Number of students and assignments (pill counters)
- Room location
- Weekly schedule (day and time)
- Short description
- View Students button — view enrolled students
- Invite link — copy and share a link for students to join
- ··· menu — additional options (Edit, Delete, etc.)
To create a new class, click + Create Class (top right). You will fill in:
| Field | Description |
|---|---|
| Teacher Name | The instructor's name |
| Class Name | Title of the course |
| Room | Physical classroom location |
| Description | Brief overview of the course |
| Schedule | Weekly day(s) and time slot (e.g., Monday 09:00–11:00) |
Note: Creating additional classes beyond the Free plan limit requires upgrading your subscription.
3.3 Assignments
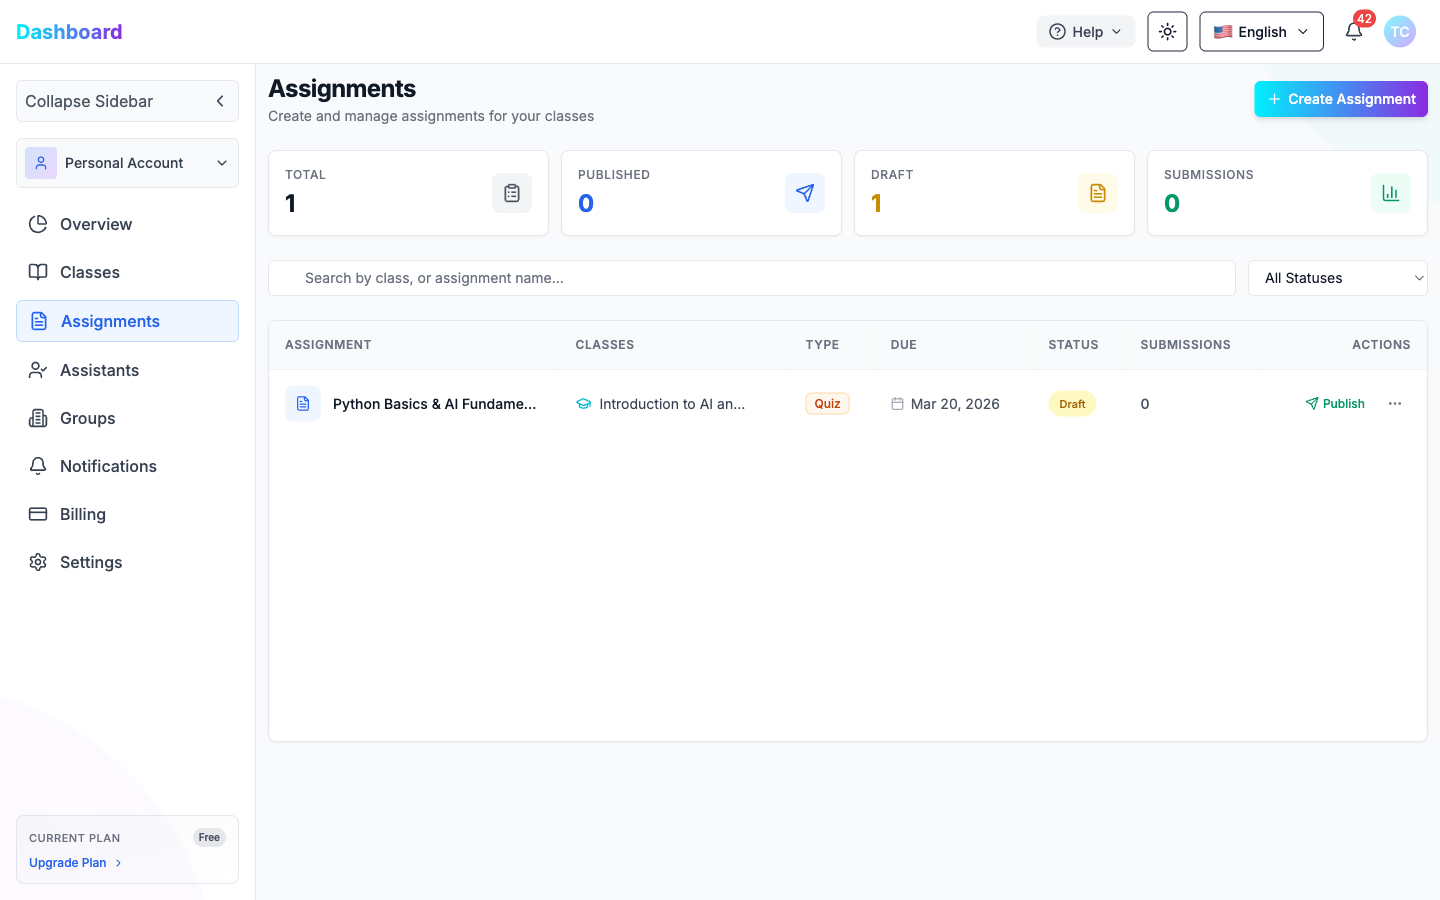
The Assignments page lists all your assignments with key information:
| Column | Description |
|---|---|
| Assignment | Name of the assignment |
| Classes | The class it belongs to |
| Type | Assignment type (Quiz, Essay, etc.) |
| Due | Due date |
| Status | Draft or Published |
| Submissions | Number of student submissions |
| Actions | Publish/Unpublish, or open the ··· menu for more options |
Summary cards at the top show totals for Total, Published, Draft, and Submissions.
Publishing an Assignment
To make an assignment visible to students, click the Publish button in the Actions column. The status badge changes from Draft to Published and the Published counter increments.
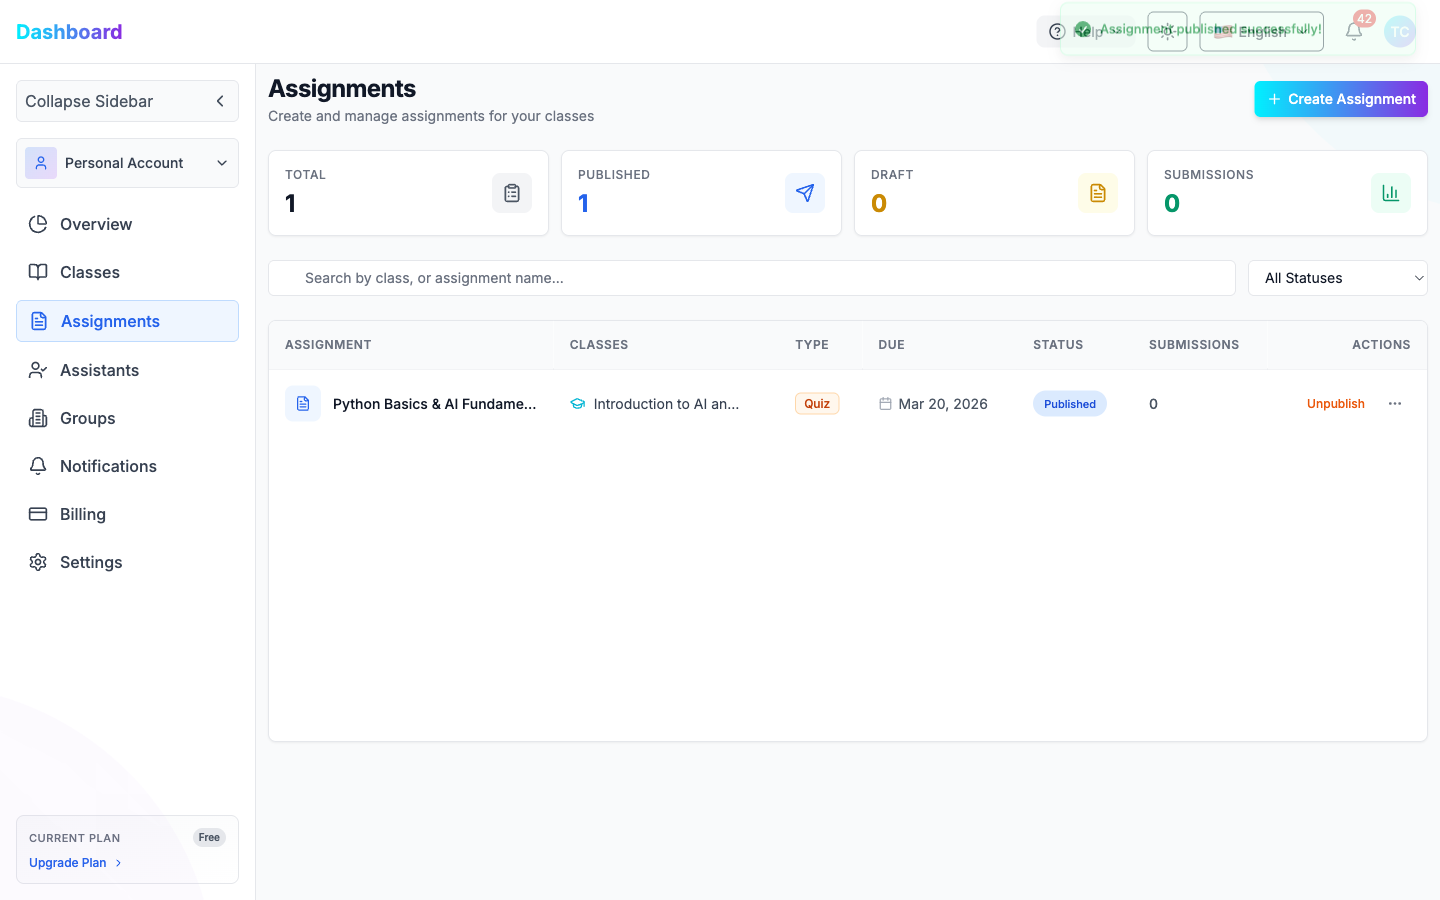
Once published, the button changes to Unpublish, allowing you to revert the assignment to Draft if needed.
3.3.1 Creating an Assignment
Click + Create Assignment to open the creation flow. It has two tabs: Details and Question(s).
Details tab fields:
| Field | Description |
|---|---|
| Assignment Title | Name of the assignment |
| Assignment Type | Quiz, Essay, etc. |
| Class | Which class this assignment belongs to |
| AI Feedback Language | Language used for AI-generated feedback |
| Due Date | Deadline for student submissions |
| AI Detection Threshold | Sensitivity level for AI-generated content detection |
Click Next to proceed to the Questions tab.
3.3.2 Adding Questions
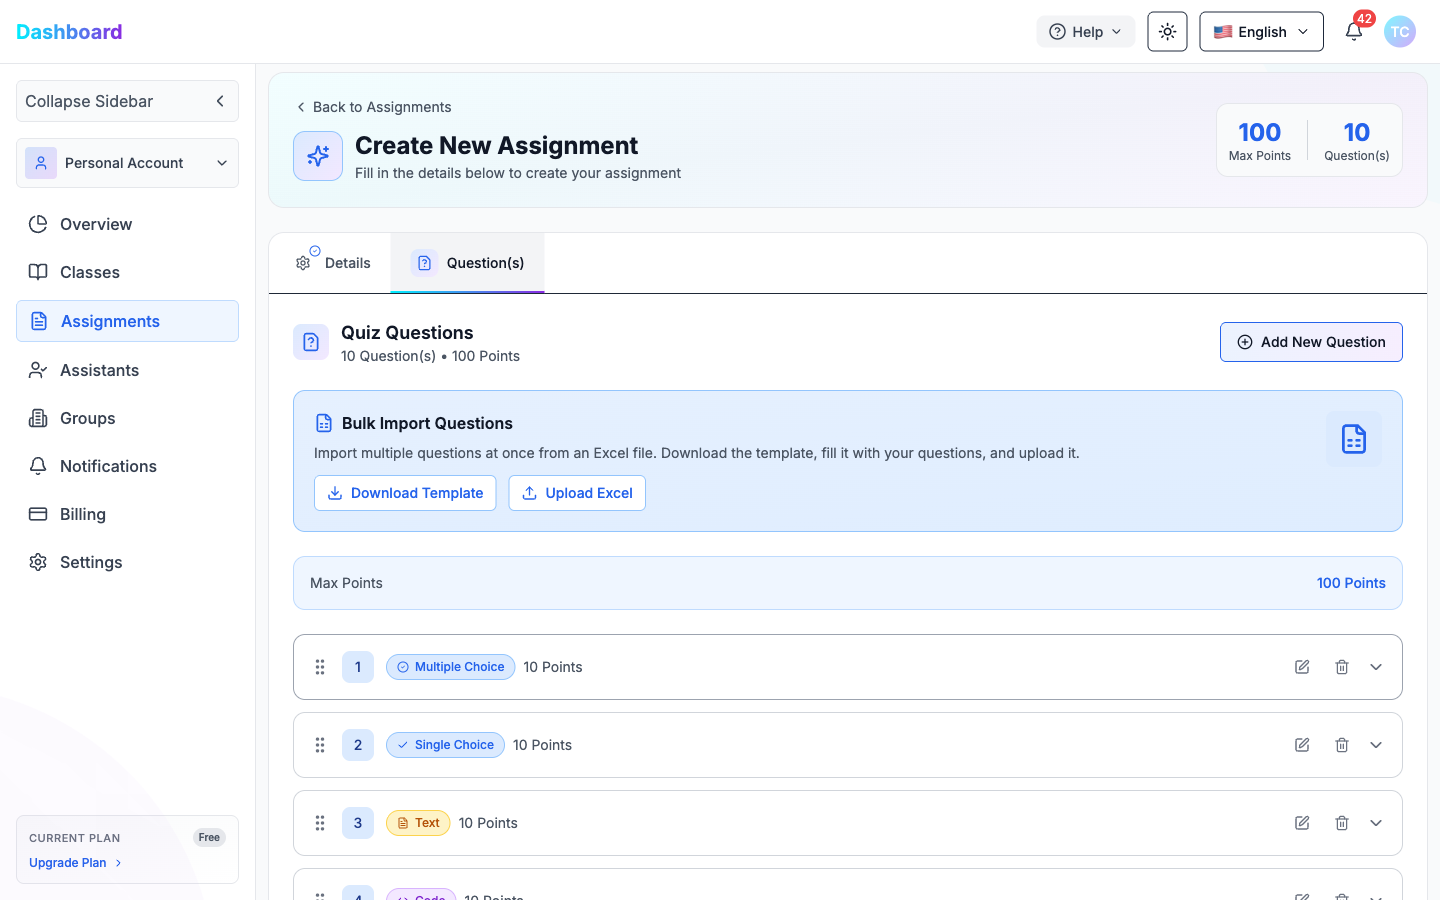
On the Question(s) tab, click Add New Question to open the question modal.
Each question supports:
| Type | Description |
|---|---|
| Multiple Choice | Students select all correct answers (checkboxes) |
| Single Choice | Students select one correct answer (radio button) |
| Text | Students write a free-text or essay response |
| Code | Students write and submit code in a selected language |
For each question you set:
- Question Type — from the dropdown
- Points — numeric point value
- Question Text — rich text with formatting support
- Answer Choices (Multiple/Single Choice) — add choices and mark correct ones
- Grading Criteria (optional, Text/Code) — named rubric items with individual point values
You can also Bulk Import Questions by downloading the Excel template, filling it in, and uploading it.
Tip: Drag the handle to reorder questions. Use the edit or delete icons to modify existing questions.
3.3.3 Editing an Assignment
To edit an existing assignment, click the ··· menu in the Actions column and select Edit.
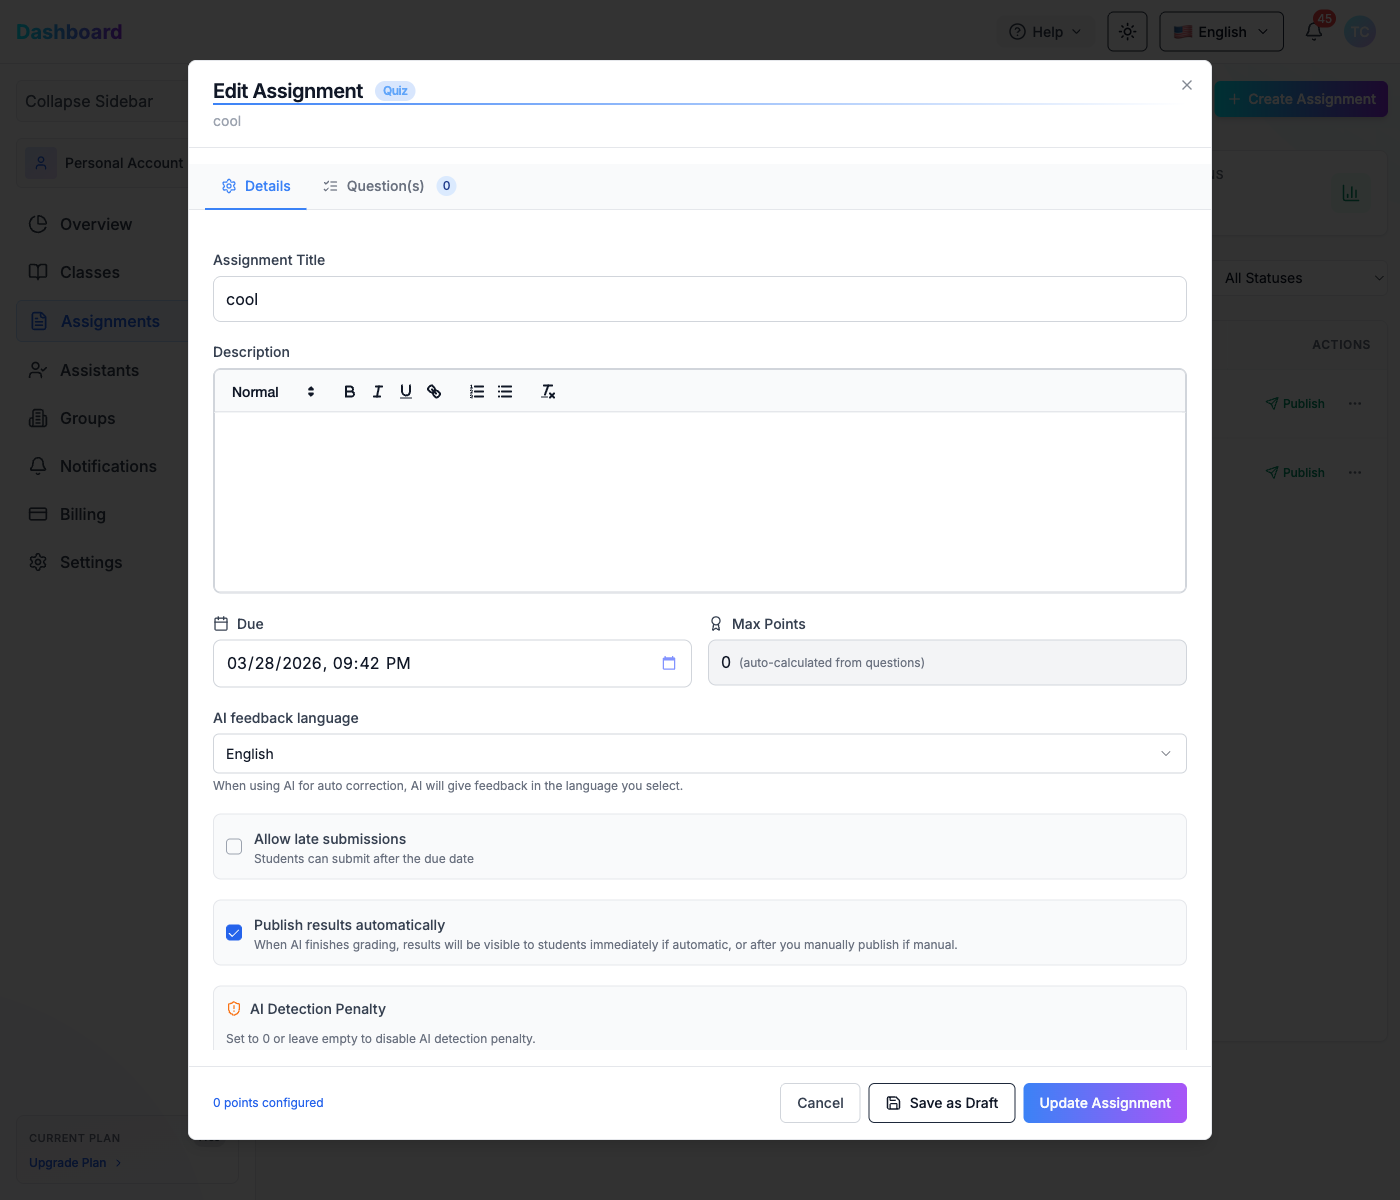
The Edit Assignment dialog opens with the same two tabs as creation: Details and Question(s).
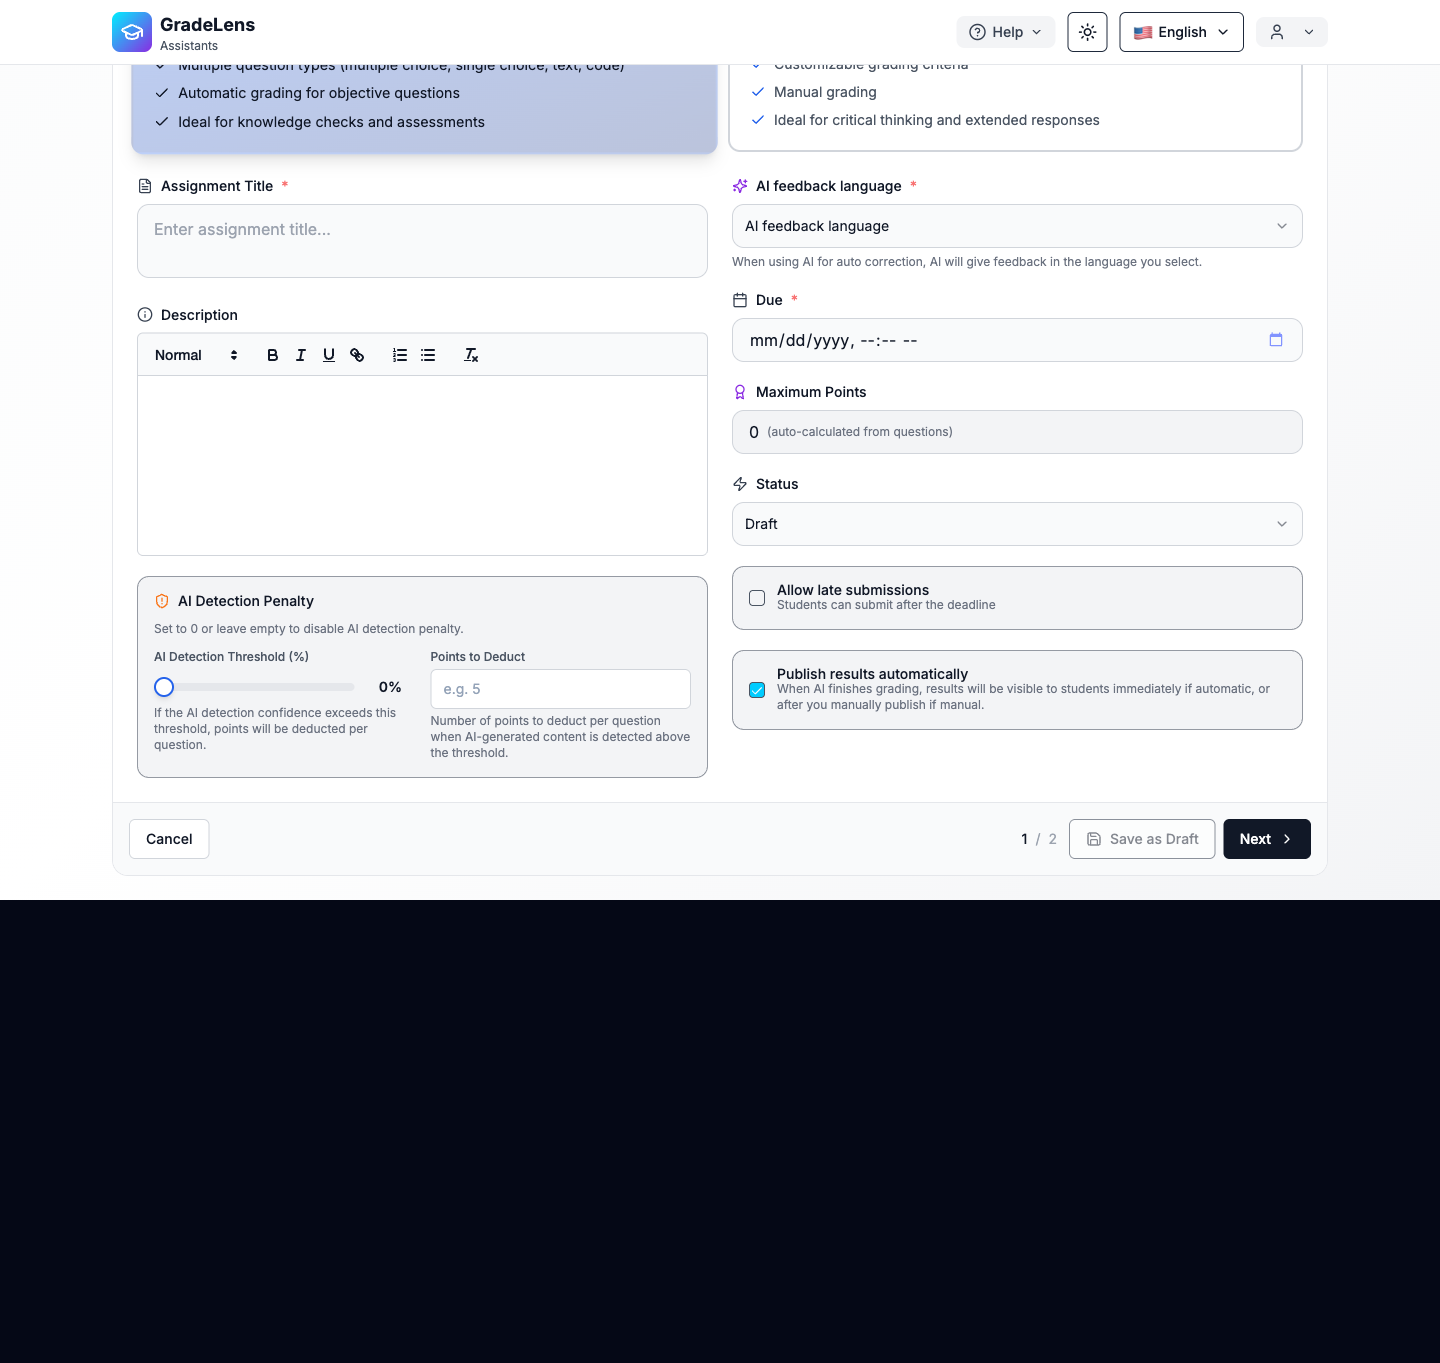
Details tab — editable fields:
| Field | Description |
|---|---|
| Assignment Title | Rename the assignment |
| Description | Rich-text description (supports headings, bold, italic, lists, links) |
| Due | Update the deadline (date and time picker) |
| Max Points | Read-only — auto-calculated from all question point values |
| AI feedback language | Language for AI-generated feedback |
| Allow late submissions | Toggle to let students submit after the due date |
| Publish results automatically | When enabled, students see their results immediately after AI grading completes |
| AI Detection Threshold (%) | Sensitivity slider — questions scoring above this confidence level trigger the penalty |
| Points to Deduct | Number of points deducted per question when AI-generated content is detected |
Note: Set AI Detection Threshold to 0 or leave Points to Deduct empty to disable the AI detection penalty entirely.
Question(s) tab:
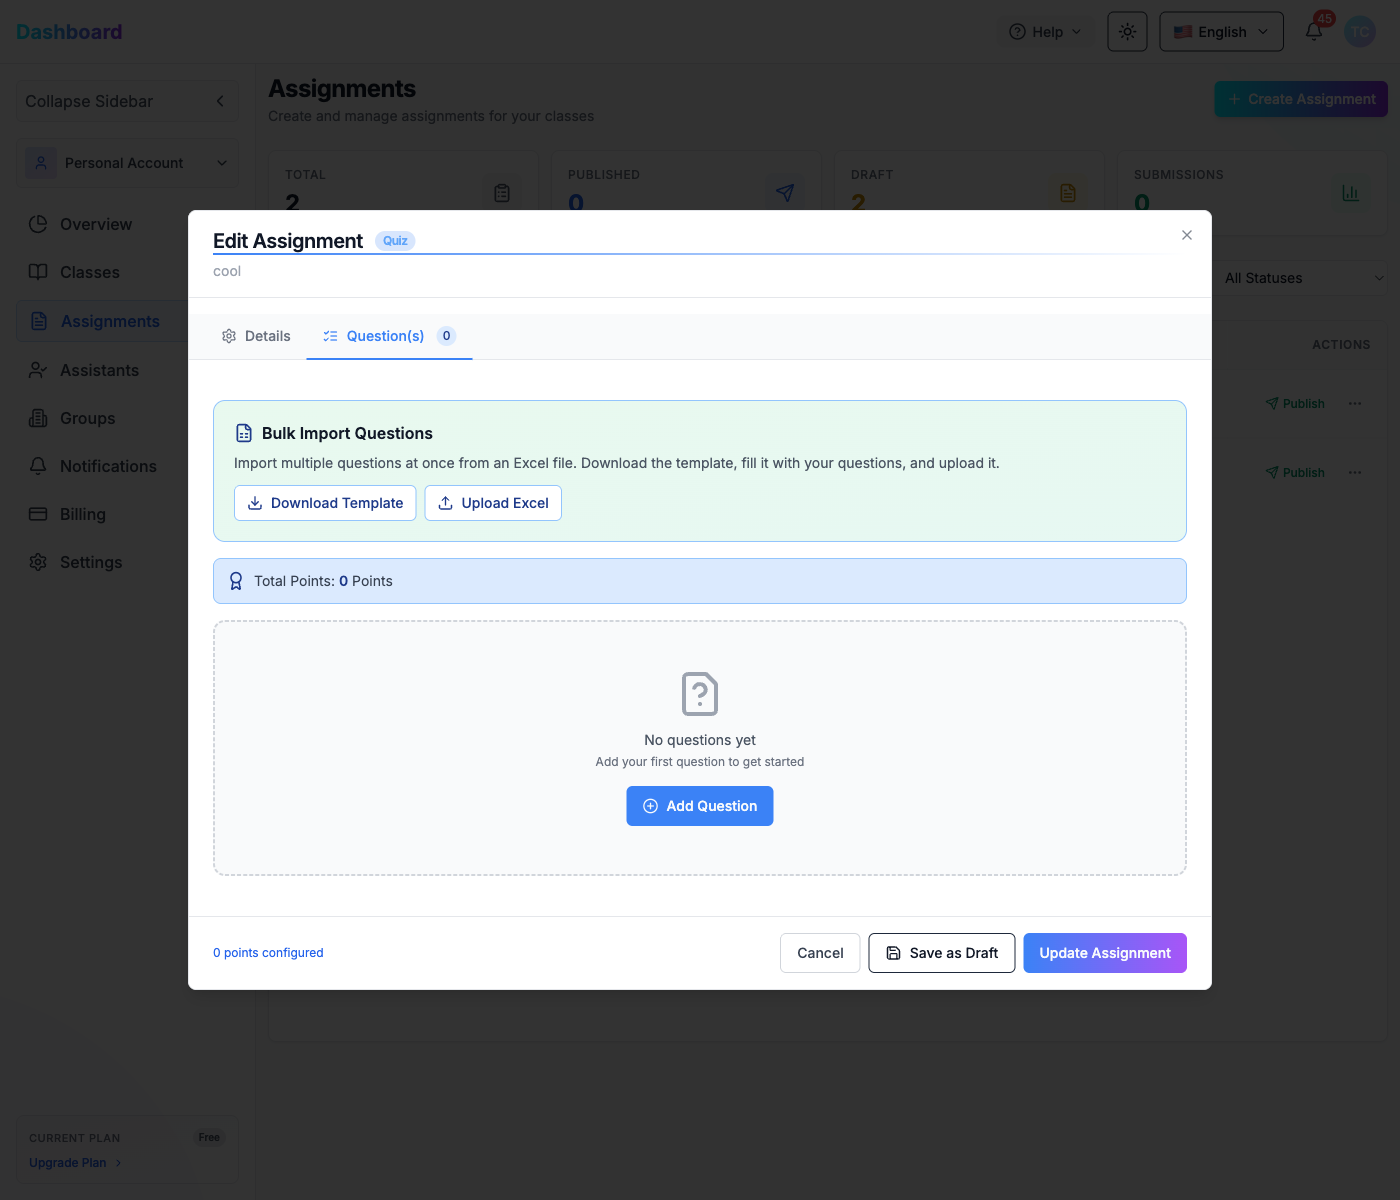
Shows all existing questions with a running Total Points counter. From here you can:
- Drag questions to reorder them
- Click the edit icon on any question to modify it
- Click the delete icon to remove a question
- Use Bulk Import Questions to add questions from an Excel template
To add a new question click Add Question:
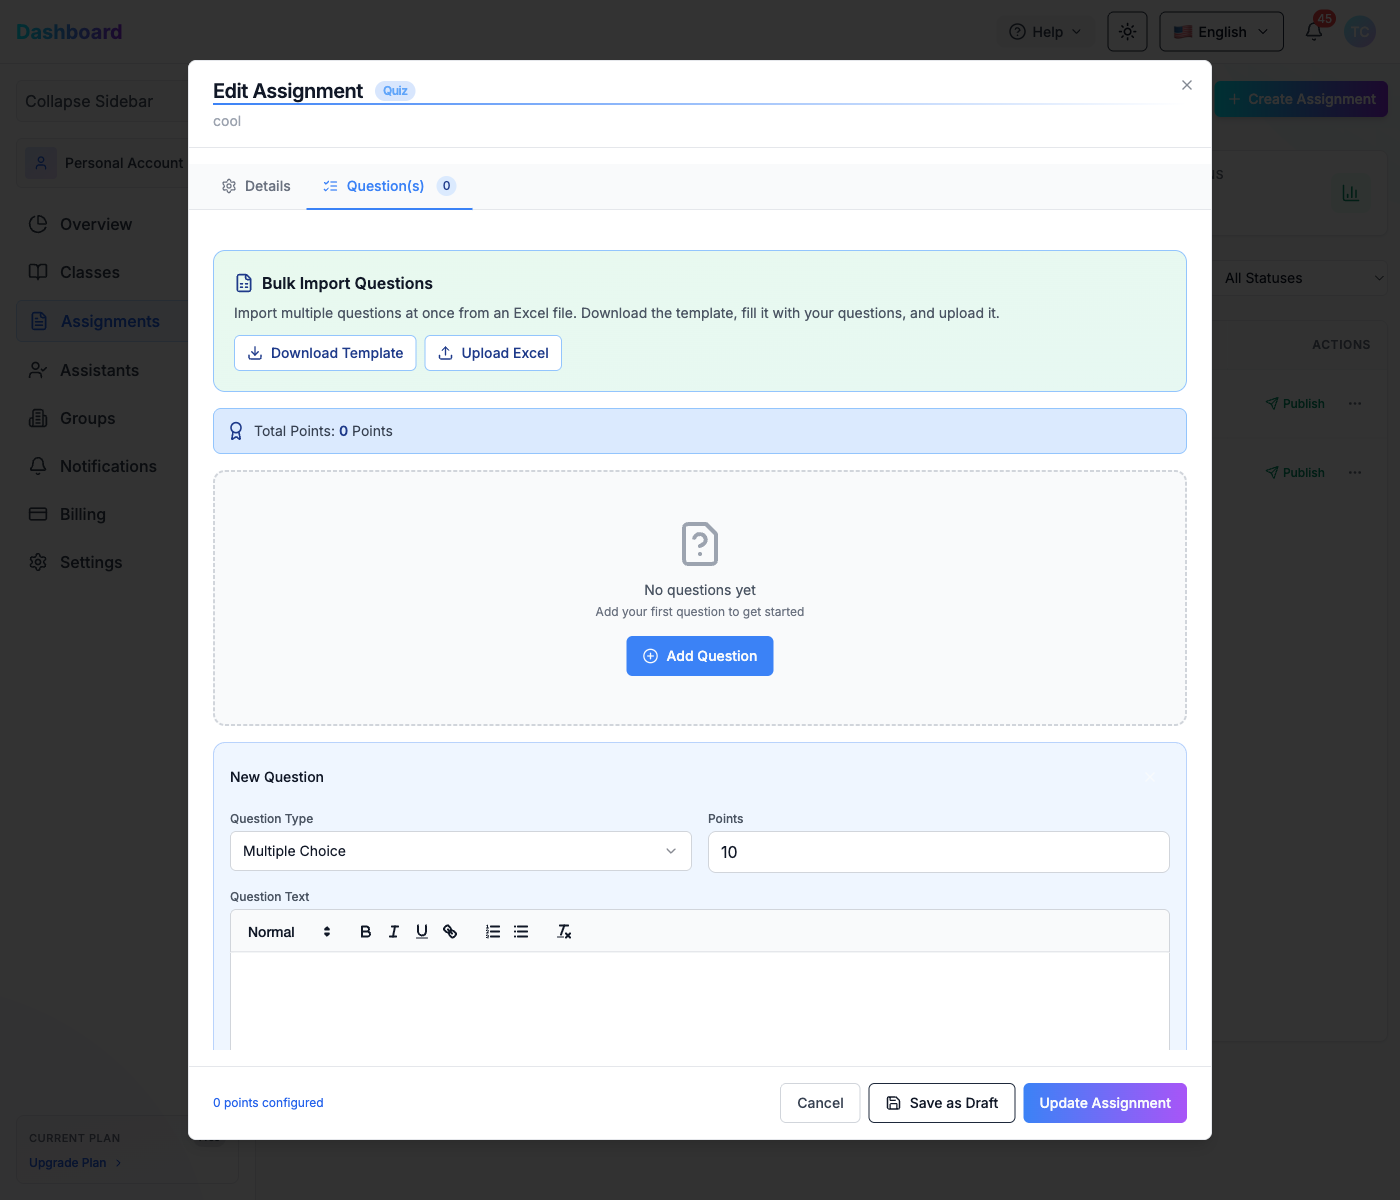
The New Question form appears inline. Set the Question Type (Multiple Choice, Single Choice, Text, or Code), enter the Points value, write the Question Text, then add answer choices or grading criteria as needed.
Footer actions:
| Button | Action |
|---|---|
| Cancel | Discard all changes and close the dialog |
| Save as Draft | Save changes but keep the assignment in Draft status |
| Update Assignment | Save and apply changes immediately |
3.4 Assistants

The Assistants page lets you invite Teaching Assistants (TAs) to help manage your classes.
To add an assistant, click Add Assistant. A modal appears:
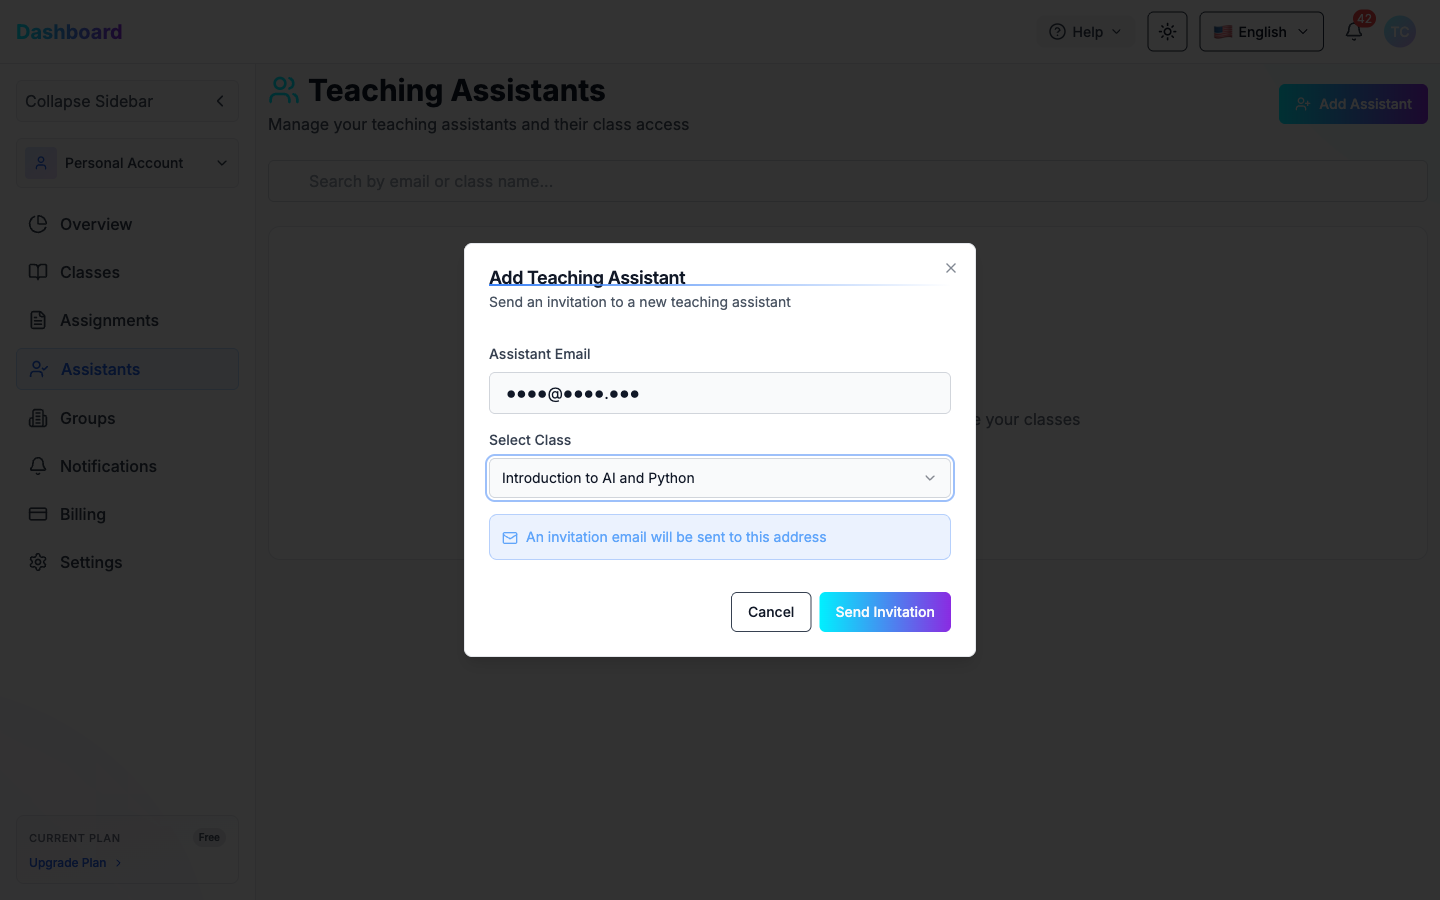
| Field | Description |
|---|---|
| Assistant Email | Email address of the TA to invite |
| Select Class | Choose which class to assign them to |
Click Send Invitation — an invitation email is sent to the address. The assistant appears in the table with Pending status until they accept.
The table columns are:
| Column | Description |
|---|---|
| Email address | The TA's email |
| Class | Assigned class |
| Status | Pending or Accepted |
| Invited | Date the invitation was sent |
| Actions | Resend invitation or remove the assistant |
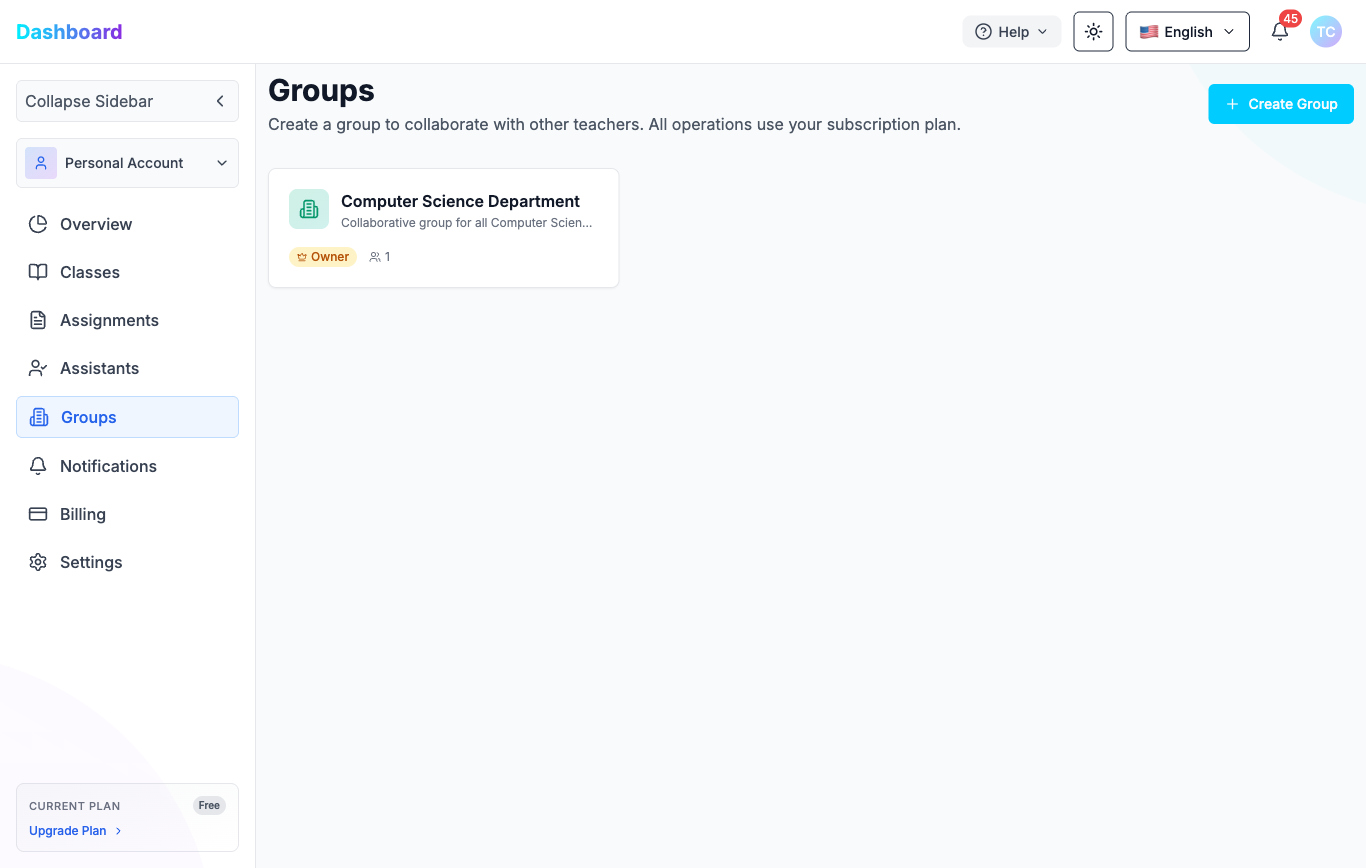
3.5 Groups
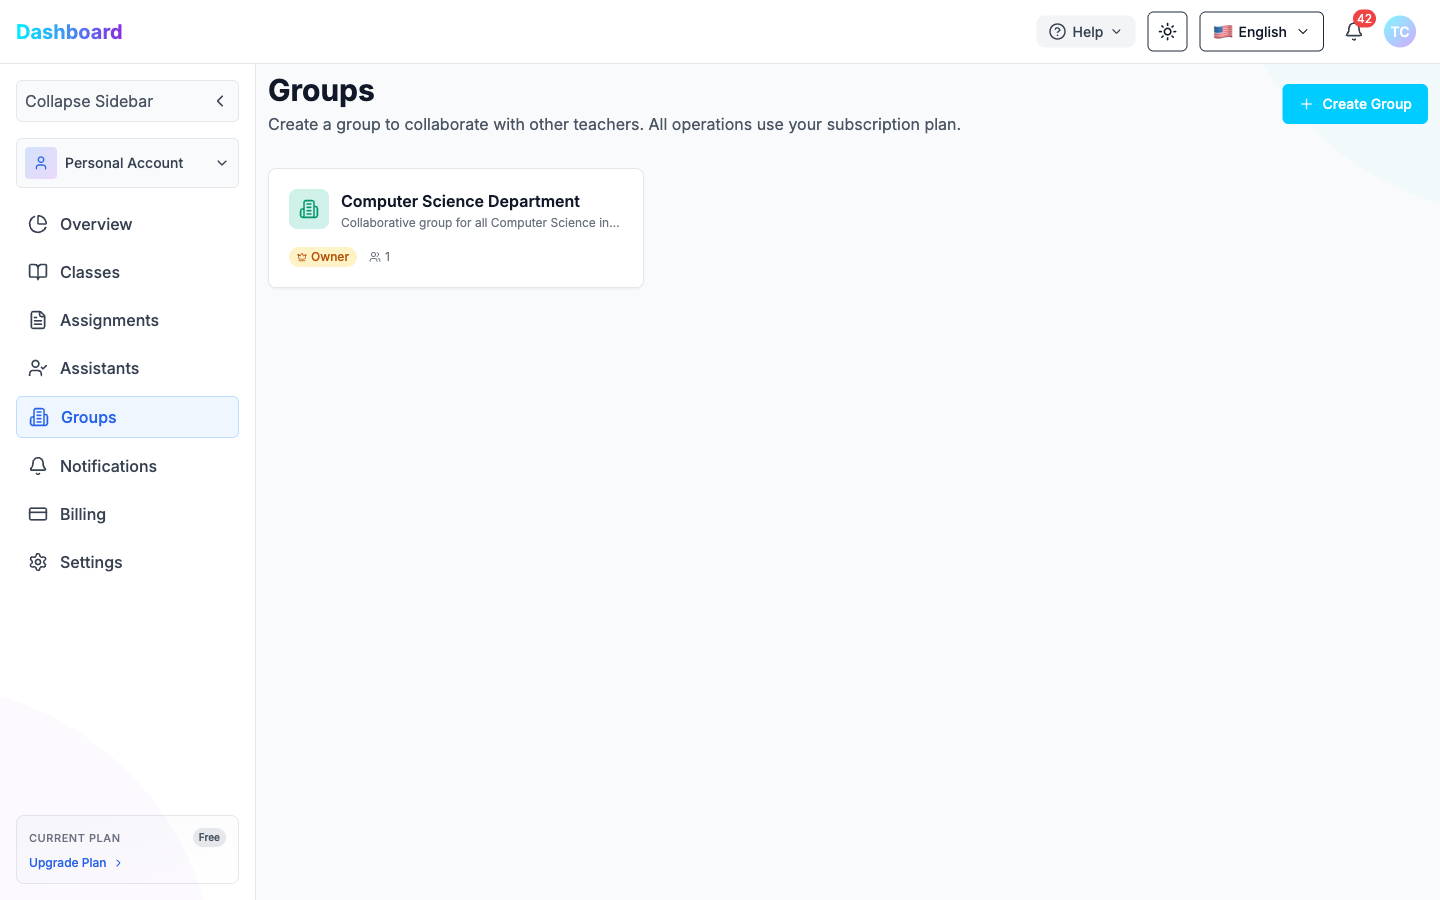
Groups allow you to collaborate with other teachers under a shared subscription plan.
To create a group, click + Create Group. A modal appears:
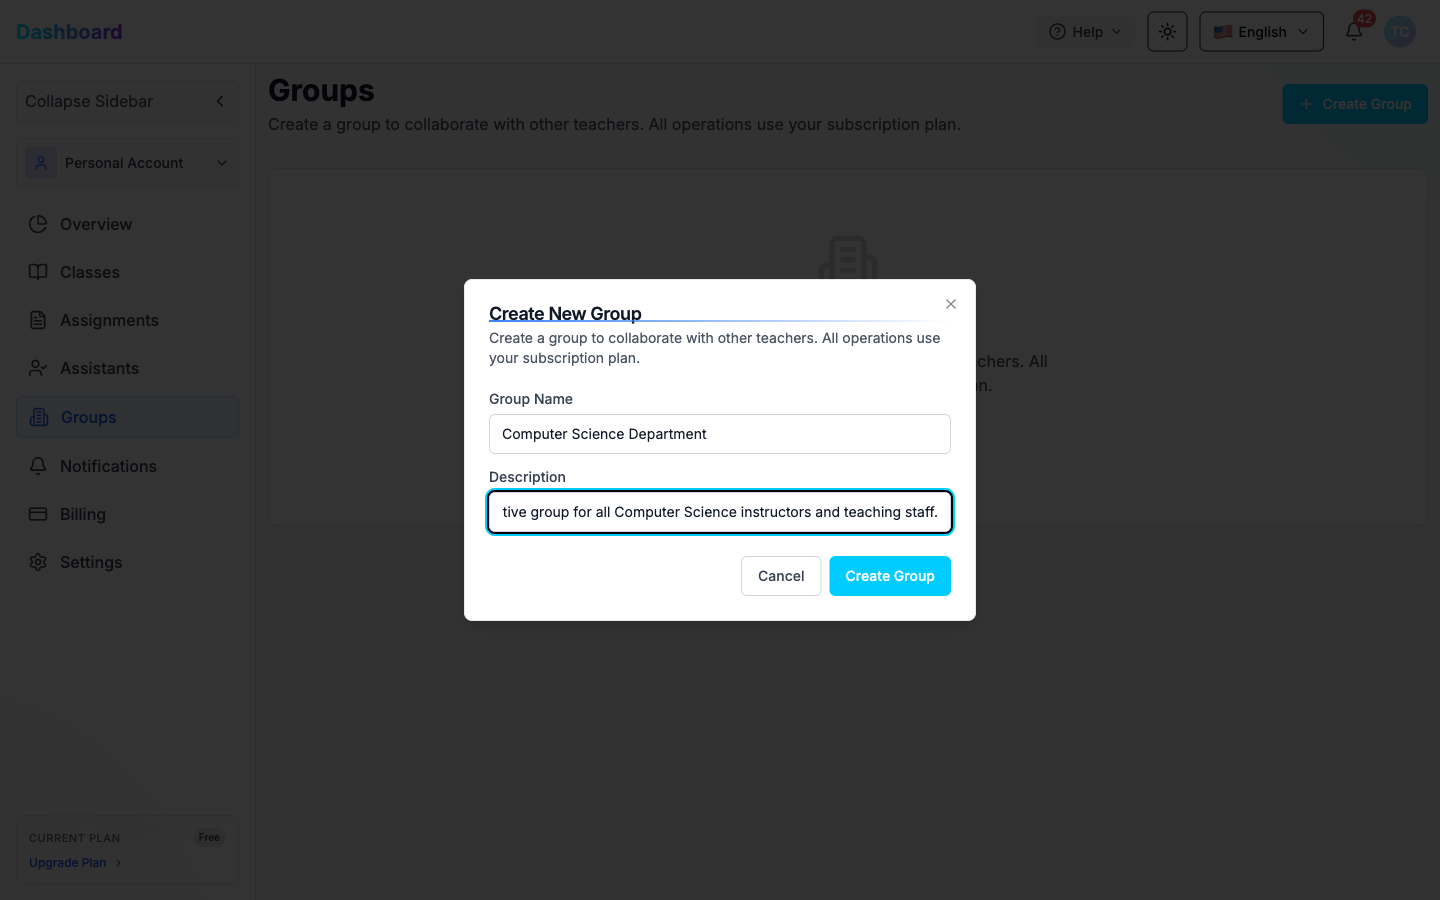
| Field | Description |
|---|---|
| Group Name | Name of the group (e.g., Computer Science Department) |
| Description | Optional description of the group's purpose |
Click Create Group to confirm. The group card appears showing your role as Owner and the member count.
- Groups share the subscription plan's resources (credits, limits).
- Use groups to organize departments or co-teaching arrangements.
3.5.1 Switching to a Group
To enter a group's context, click the account switcher (Personal Account button) in the sidebar. A dropdown shows your personal account and all groups you belong to. Click the group name to switch into it.
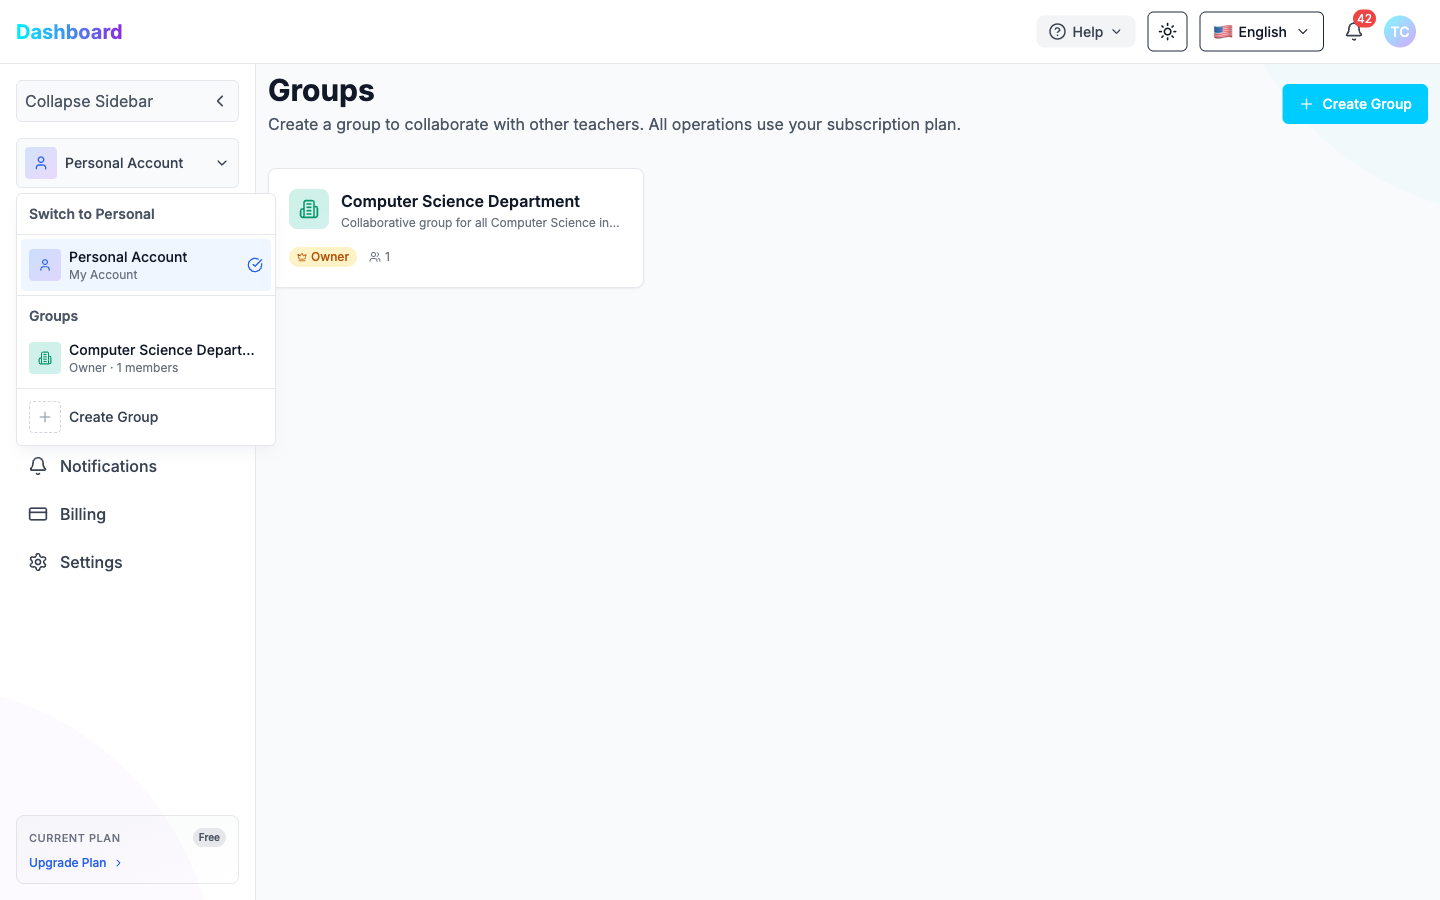
Once inside a group, the sidebar changes to show group-specific navigation: Teachers, Manage Group, and Billing.
3.5.2 Managing a Group
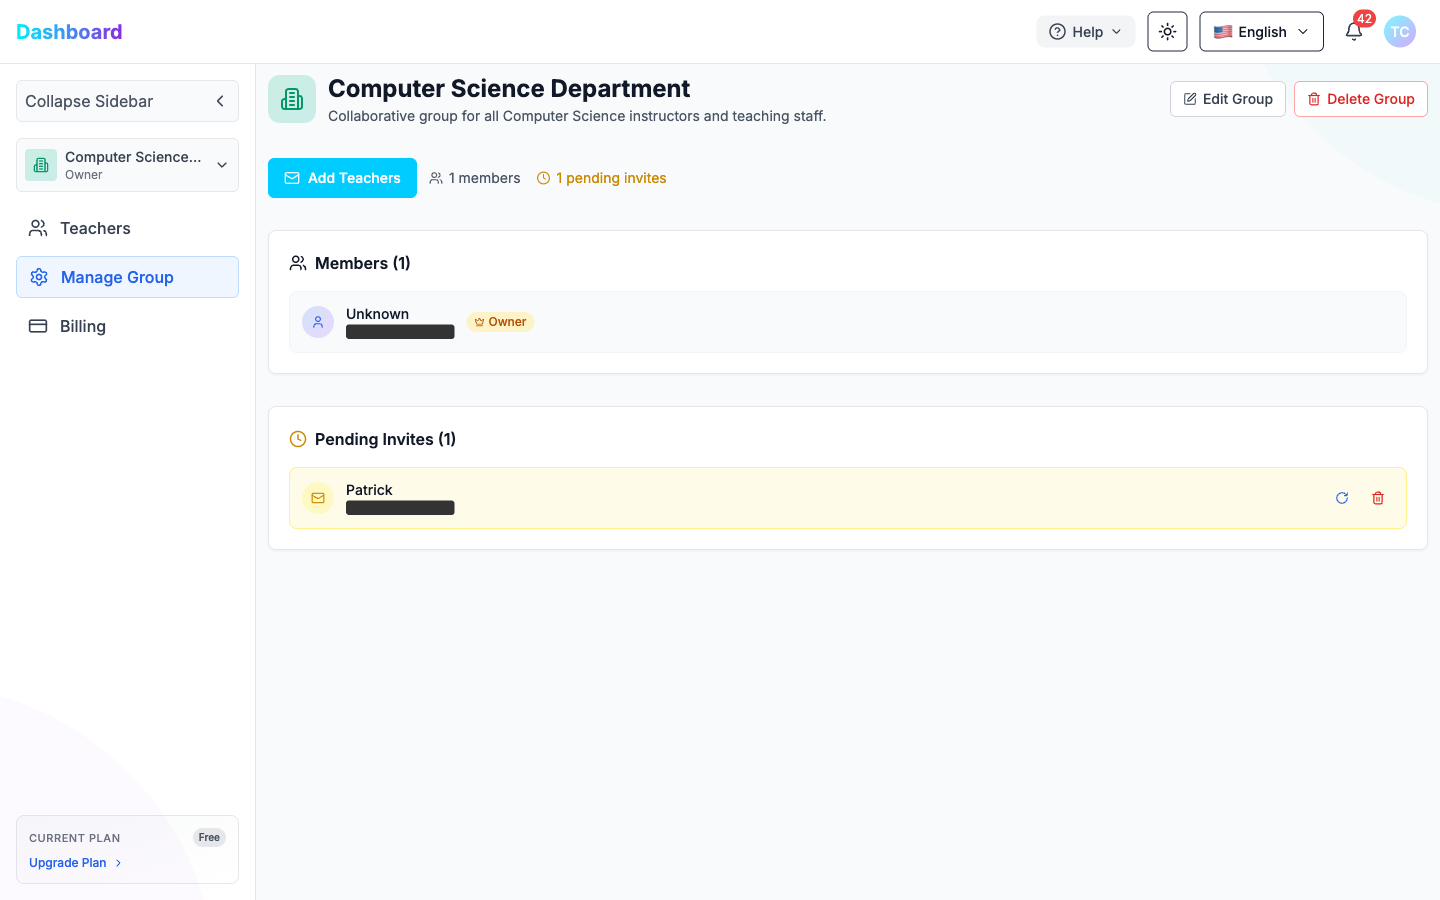
Go to Manage Group in the sidebar to manage your group's members. From here you can:
| Action | How |
|---|---|
| Edit group info | Click Edit Group (top right) to update name or description |
| Delete the group | Click Delete Group (top right) |
| Add teachers | Click Add Teachers to invite a teacher by email |
| Resend an invite | Click the resend icon next to a pending invite |
| Cancel an invite | Click the cancel icon next to a pending invite |
To add a teacher, click Add Teachers:
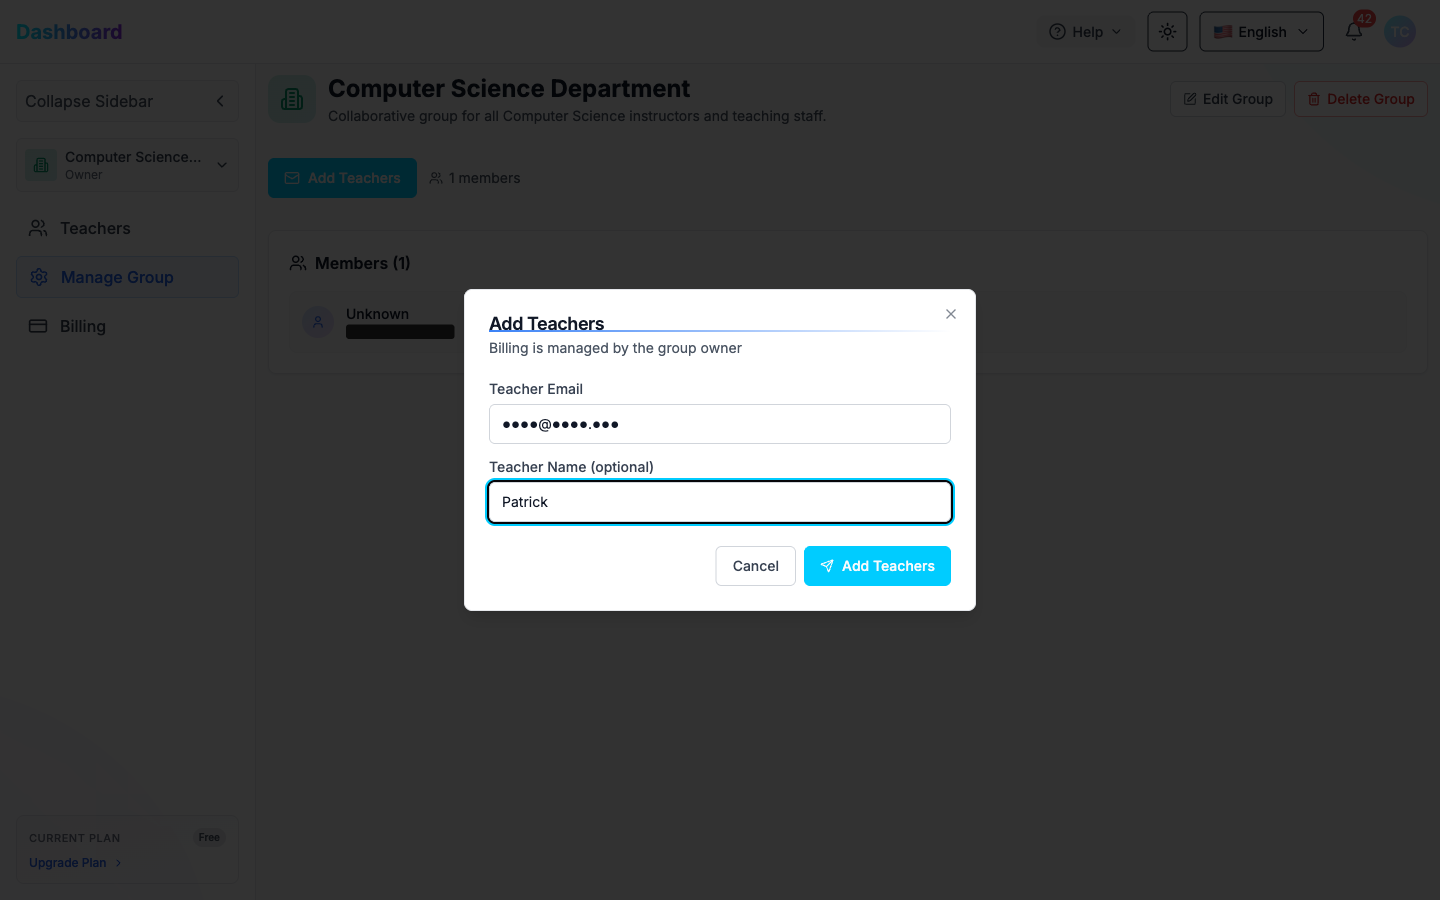
| Field | Description |
|---|---|
| Teacher Email | Email address of the teacher to invite |
| Teacher Name (optional) | Display name for the teacher |
Click Add Teachers to send the invitation. The teacher appears under Pending Invites until they accept. Active members are shown under Members.
Note: Billing for all group members is managed by the group owner.
3.5.3 Accepting a Group Invitation (as an invited teacher)
When a group owner sends you an invitation, you receive an email containing a unique invite link. Clicking the link opens the Teacher Group Invitation page.
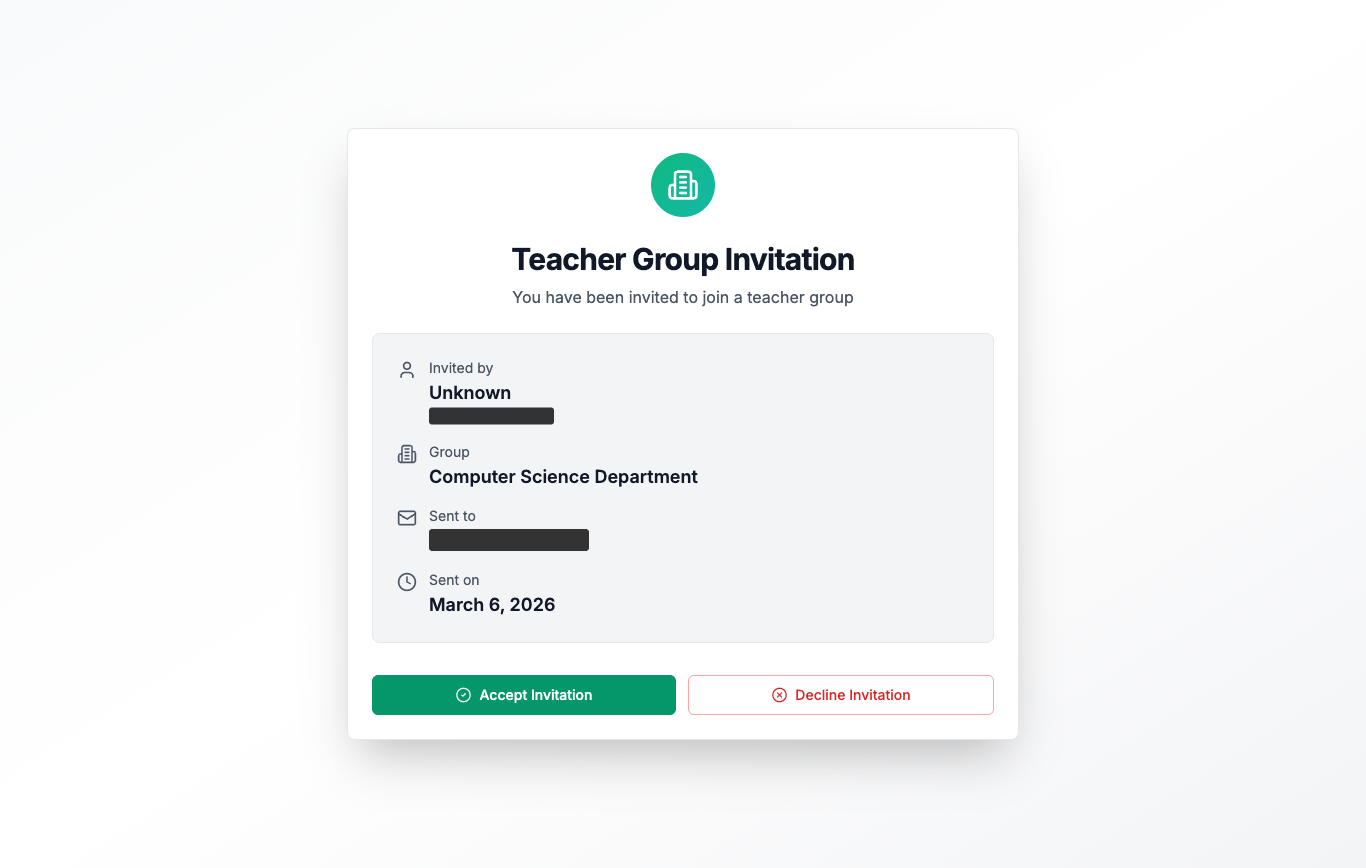
The page shows:
| Field | Description |
|---|---|
| Invited by | Name of the group owner who sent the invite |
| Group | Name of the group you are being invited to join |
| Sent to | Your email address |
| Sent on | Date the invitation was sent |
Click Accept Invitation to join the group. You will be redirected to the Groups page, where the group appears in your list.
Click Decline Invitation to reject the invite.
3.5.4 Group Member Teacher Portal
Once you have accepted a group invitation, switch into the group context using the account switcher in the sidebar (see Section 3.5.1). The sidebar will show only the features available to group members:
| Sidebar Item | Description |
|---|---|
| Overview | Summary of your classes and assignments within the group |
| Classes | Create and manage classes under the group subscription |
| Assignments | Create, edit, publish, and grade assignments |
| Assistants | Invite TAs to assist with your classes |
| Notifications | Group and assignment event alerts |
Note: Group members do not have access to Groups, Billing, or Settings — these are managed by the group owner.
All features work identically to your personal teacher account. Refer to the following sections for full details:
Managing Classes Create classes, share the invite link with students, and view enrolled students — see Section 3.2 Classes.
Managing Assignments Create assignments with multiple question types, set due dates, configure AI feedback language, and manage the AI Detection Penalty — see Section 3.3 Assignments and Section 3.3.1 Creating an Assignment.
Adding Questions Add Multiple Choice, Single Choice, Text, and Code questions with grading criteria — see Section 3.3.2 Adding Questions.
Editing Assignments Update assignment details, reorder questions, or add new ones — see Section 3.3.3 Editing an Assignment.
Publishing & Grading Publish assignments to make them visible to students, then use Auto grade all with AI to grade all submissions at once. Review results in the Graded tab and view per-student AI feedback — see Section 3.3 Assignments.
Inviting Teaching Assistants Add TAs to help manage your classes by sending them an email invitation — see Section 3.4 Assistants.
3.6 Notifications
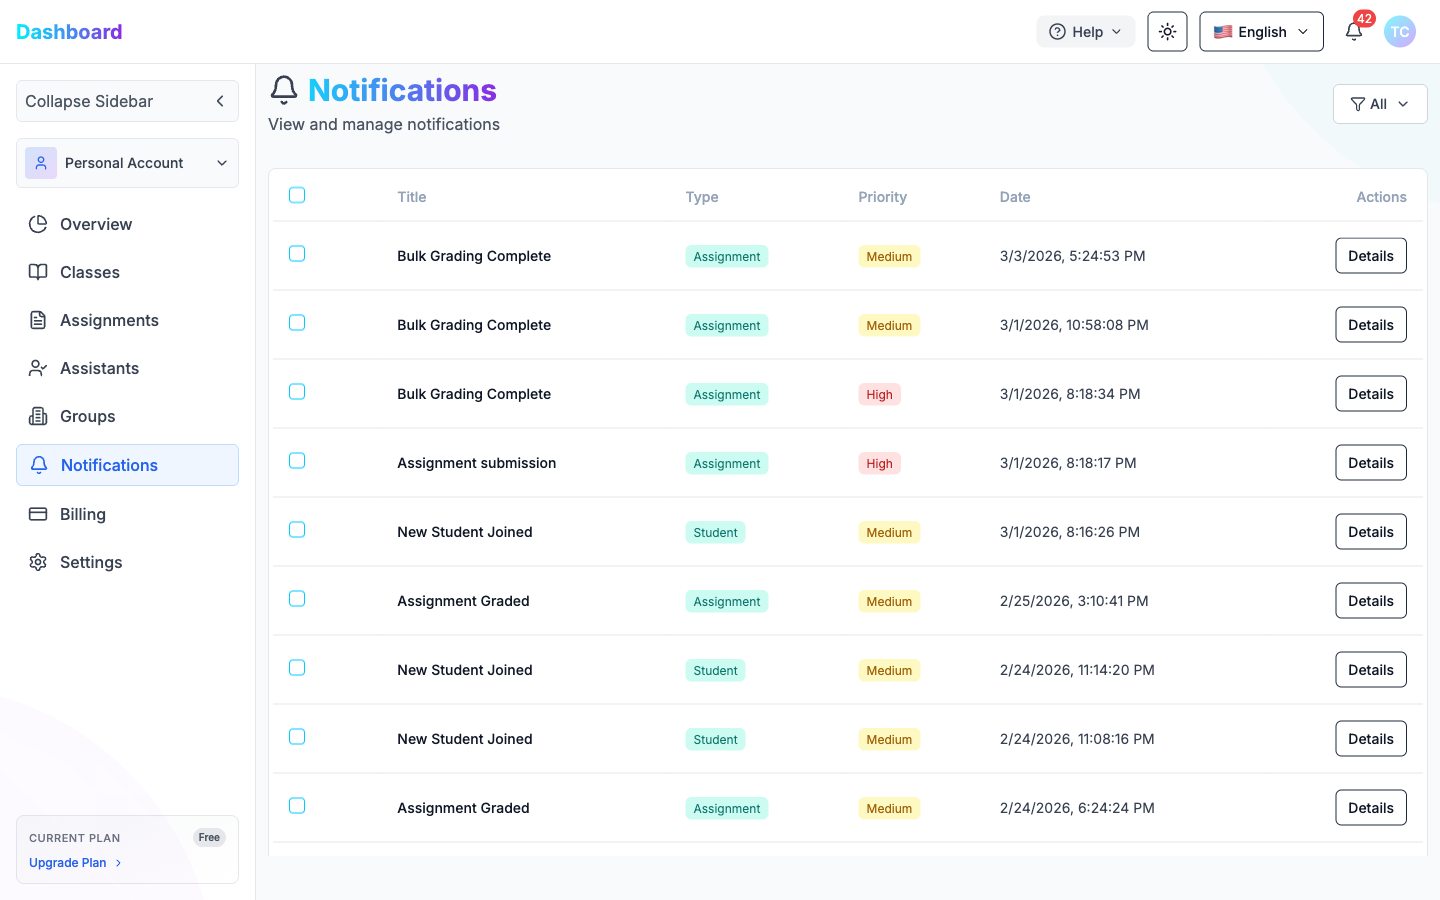
The Notifications page shows all system events related to your account. Each notification includes:
| Column | Description |
|---|---|
| Title | Event name (e.g., Bulk Grading Complete, New Student Joined) |
| Type | Category — Assignment or Student |
| Priority | High or Medium |
| Date | Timestamp of the event |
| Actions | Click Details to view full notification content |
Use the All filter dropdown (top right) to filter by type.
3.7 Billing
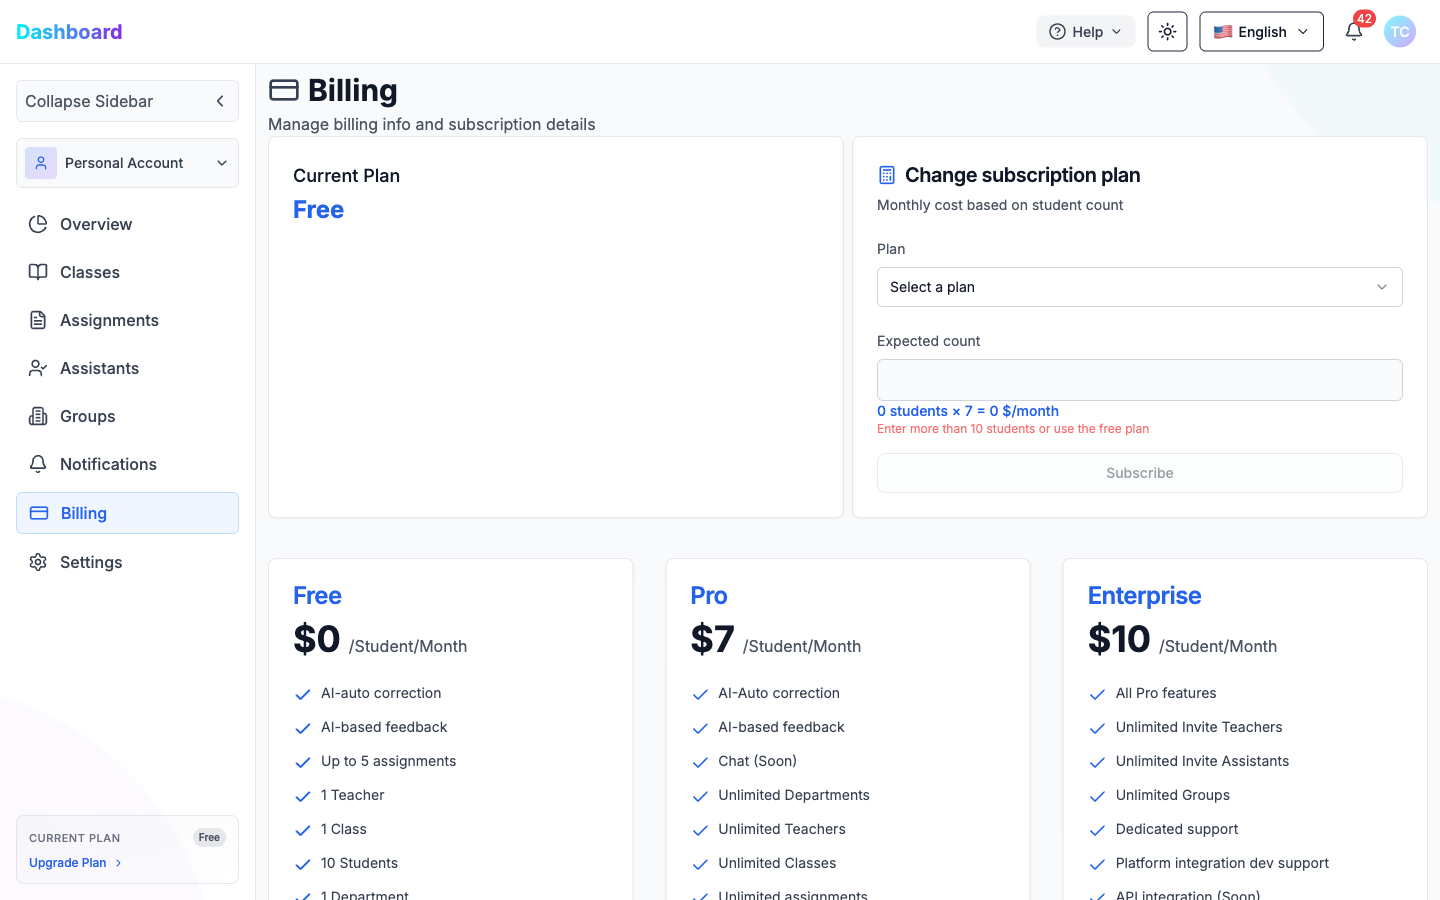
The Billing page shows your current subscription plan and lets you upgrade.
Current Plan is displayed on the left. To change plans:
- Select a plan from the Plan dropdown.
- Enter your Expected count (number of students).
- Click Subscribe.
Available plans:
| Plan | Price | Key Features |
|---|---|---|
| Free | $0 /Student/Month | AI auto-correction, AI feedback, up to 5 assignments, 1 teacher, 1 class, 10 students |
| Pro | $7 /Student/Month | All Free features + Chat (Soon), Unlimited Departments, Teachers, Classes, and Assignments |
| Enterprise | $10 /Student/Month | All Pro features + Unlimited Teachers/Assistants/Groups, Dedicated support, API integration |
Note: The minimum is 10 students for paid plans. The formula shown is:
students × rate = monthly cost.
3.8 Settings
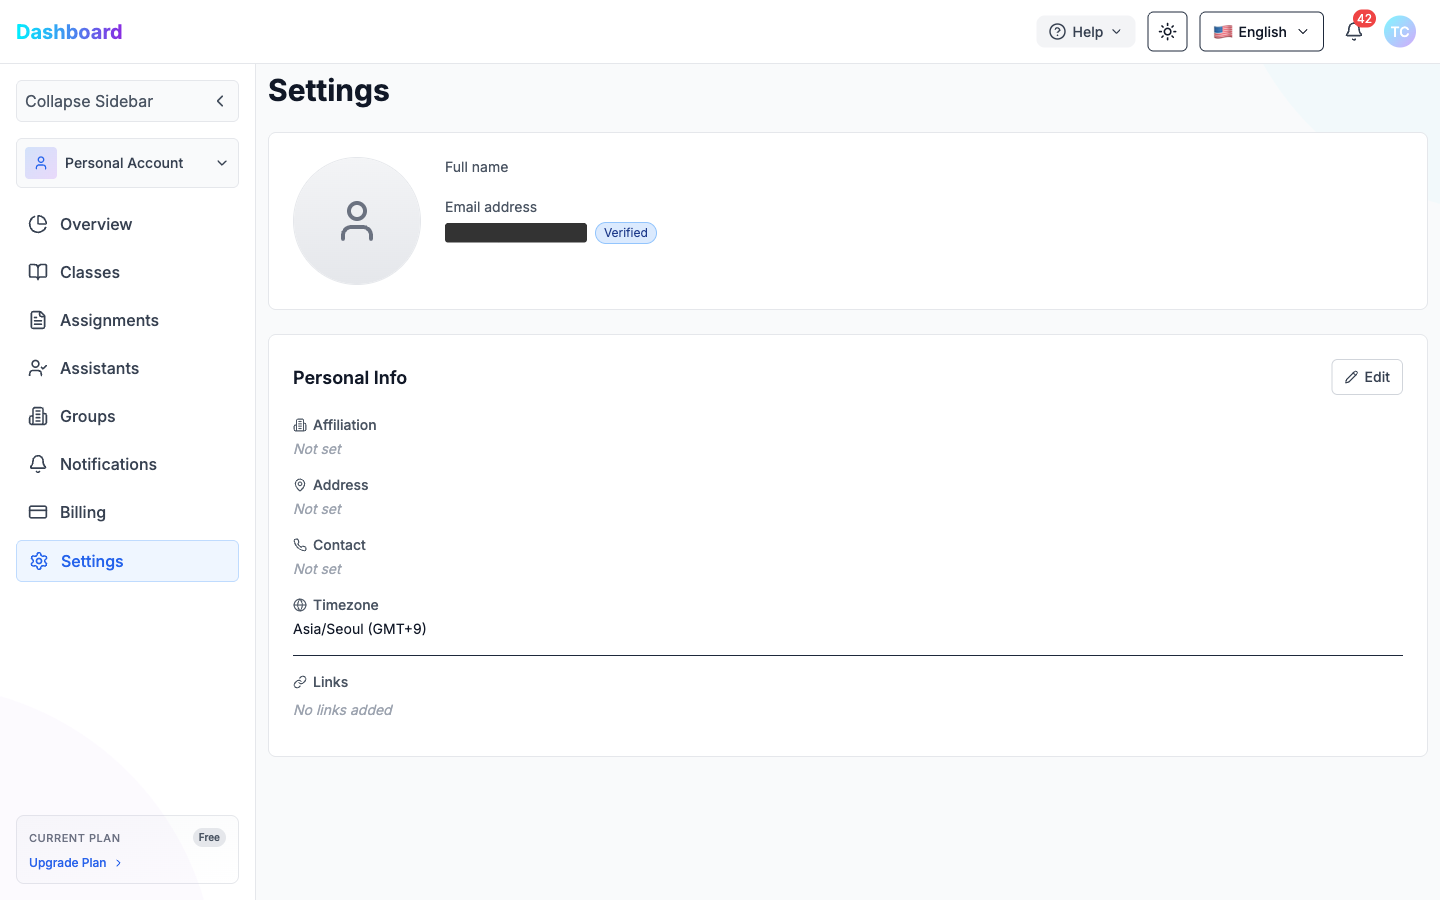
The Settings page lets you manage your personal profile information.
Profile section:
- Profile avatar
- Full name
- Email address (with Verified badge)
Personal Info section (click Edit to modify):
| Field | Description |
|---|---|
| Affiliation | Your institution or organization |
| Address | Your physical address |
| Contact | Phone or contact number |
| Timezone | Your local timezone (e.g., Asia/Seoul GMT+9) |
| Links | External links (e.g., personal website, LinkedIn) |
4. TA / Assistant Portal
Teaching Assistants access a dedicated portal after accepting an invitation from a teacher.
4.1 Accepting the Invitation
When a teacher sends a TA invitation, you receive an email with a unique invite link. Clicking it opens the Teaching Assistant Invitation page.
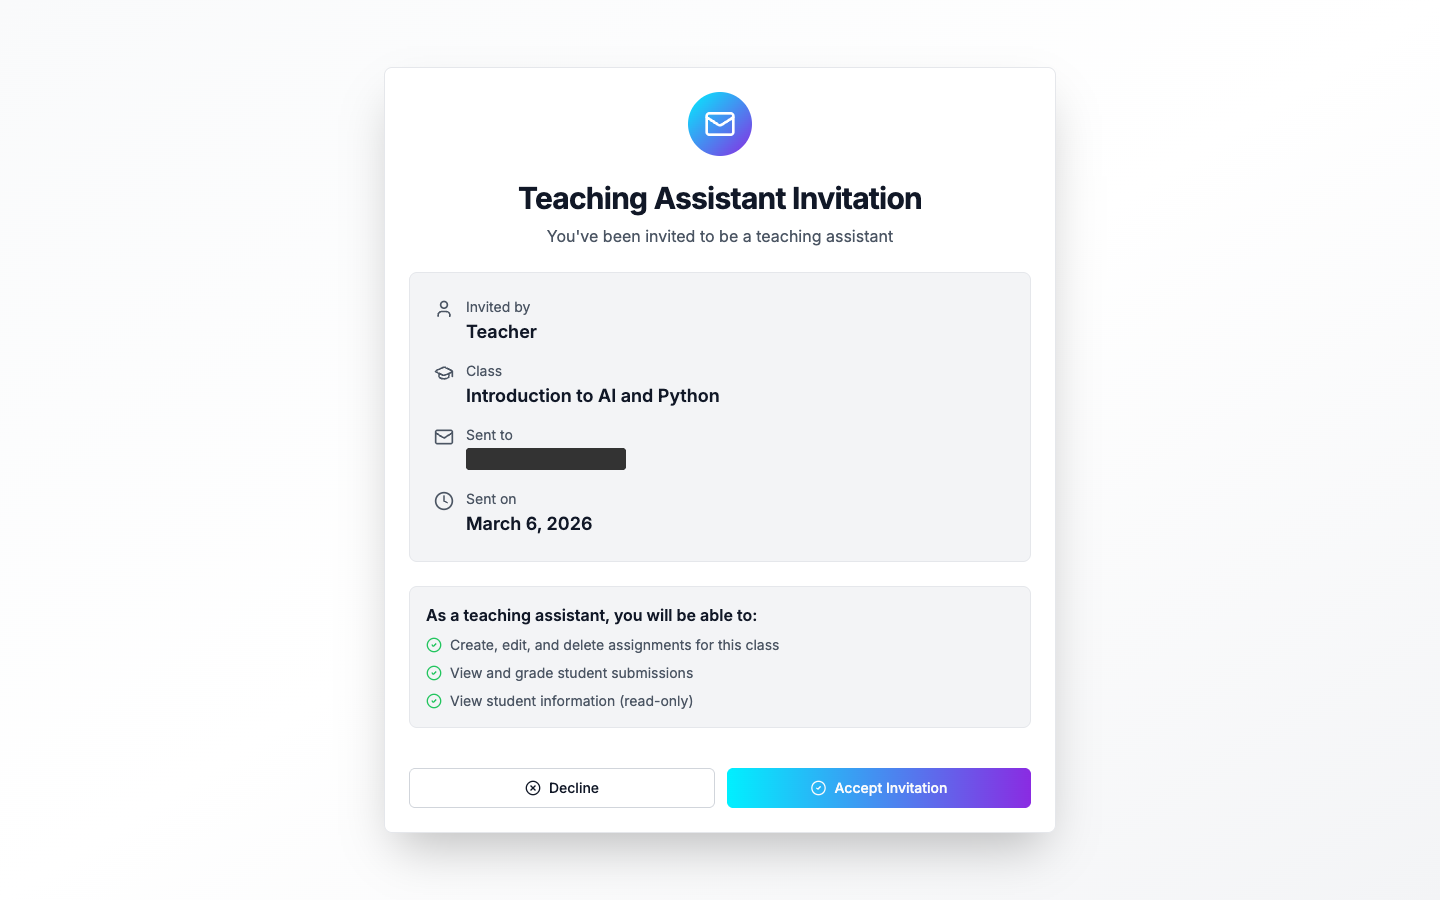
The page shows:
- Invited by — the teacher's name
- Class — the class you are being assigned to
- Sent to — your email address
- Sent on — invitation date
As a teaching assistant, you will be able to:
- Create, edit, and delete assignments for this class
- View and grade student submissions
- View student information (read-only)
Click Accept Invitation to join. You will be redirected to the Assistants Dashboard automatically.
Click Decline to reject the invitation.
4.2 Assistants Dashboard
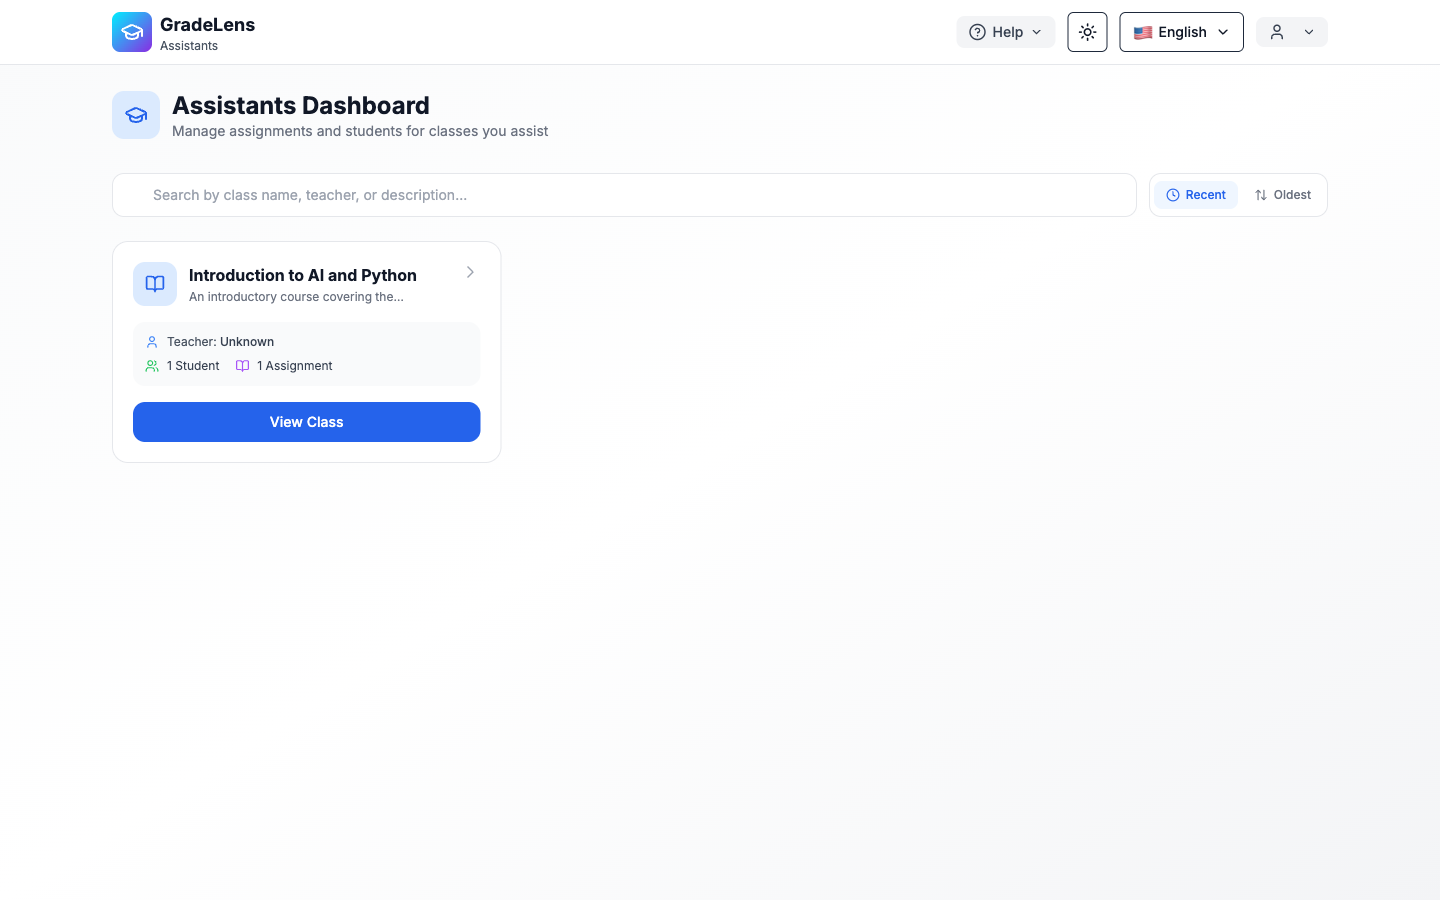
After accepting, you land on the Assistants Dashboard showing all classes you assist. Each class card displays:
- Class name and description
- Teacher name
- Number of students and assignments
- View Class button
4.3 Viewing a Class — Assignments
Click View Class to open the class assignments page.
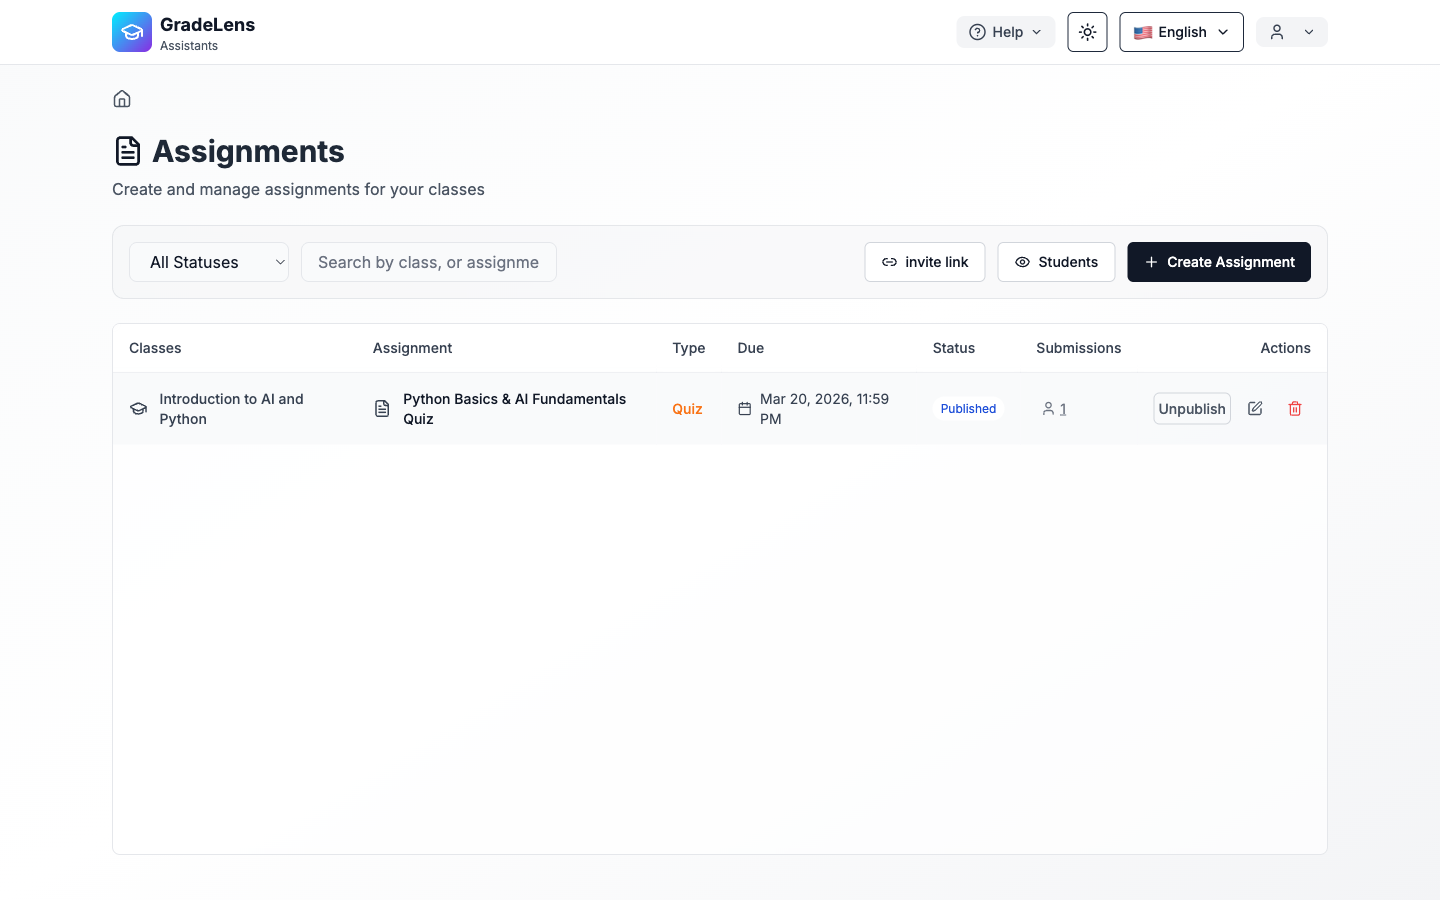
The assignments table shows:
| Column | Description |
|---|---|
| Classes | The class the assignment belongs to |
| Assignment | Assignment name |
| Type | Quiz, Essay, etc. |
| Due | Deadline |
| Status | Draft or Published |
| Submissions | Number of student submissions |
| Actions | Publish/Unpublish, Edit, Delete |
Additional buttons available:
- invite link — copy the class invite link to share with students
- Students — view the enrolled students list
- Create Assignment — create a new assignment for this class
4.4 Viewing Students
Click Students to see all enrolled students (read-only).
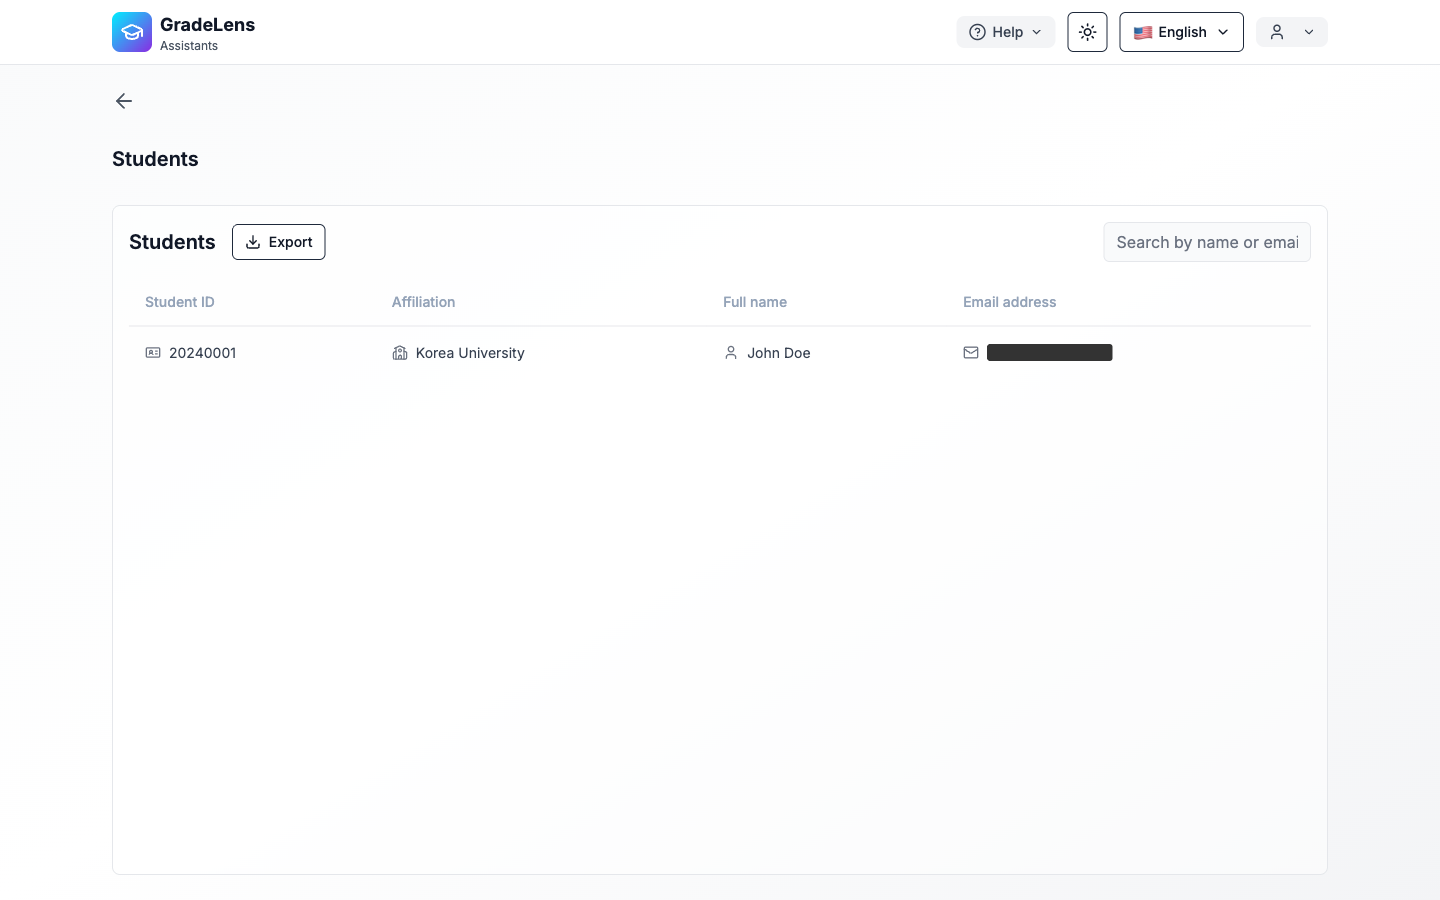
The table shows each student's Student ID, Affiliation, Full name, and Email address. You can search by name or email, and export the list.
4.5 Creating an Assignment
Click + Create Assignment to open the assignment creation form.
The form is identical to the Teacher Portal — see Section 3.3.1 Creating an Assignment for full details.
4.6 Viewing & Grading Submissions
Click the submission count for any assignment to open the submissions page.
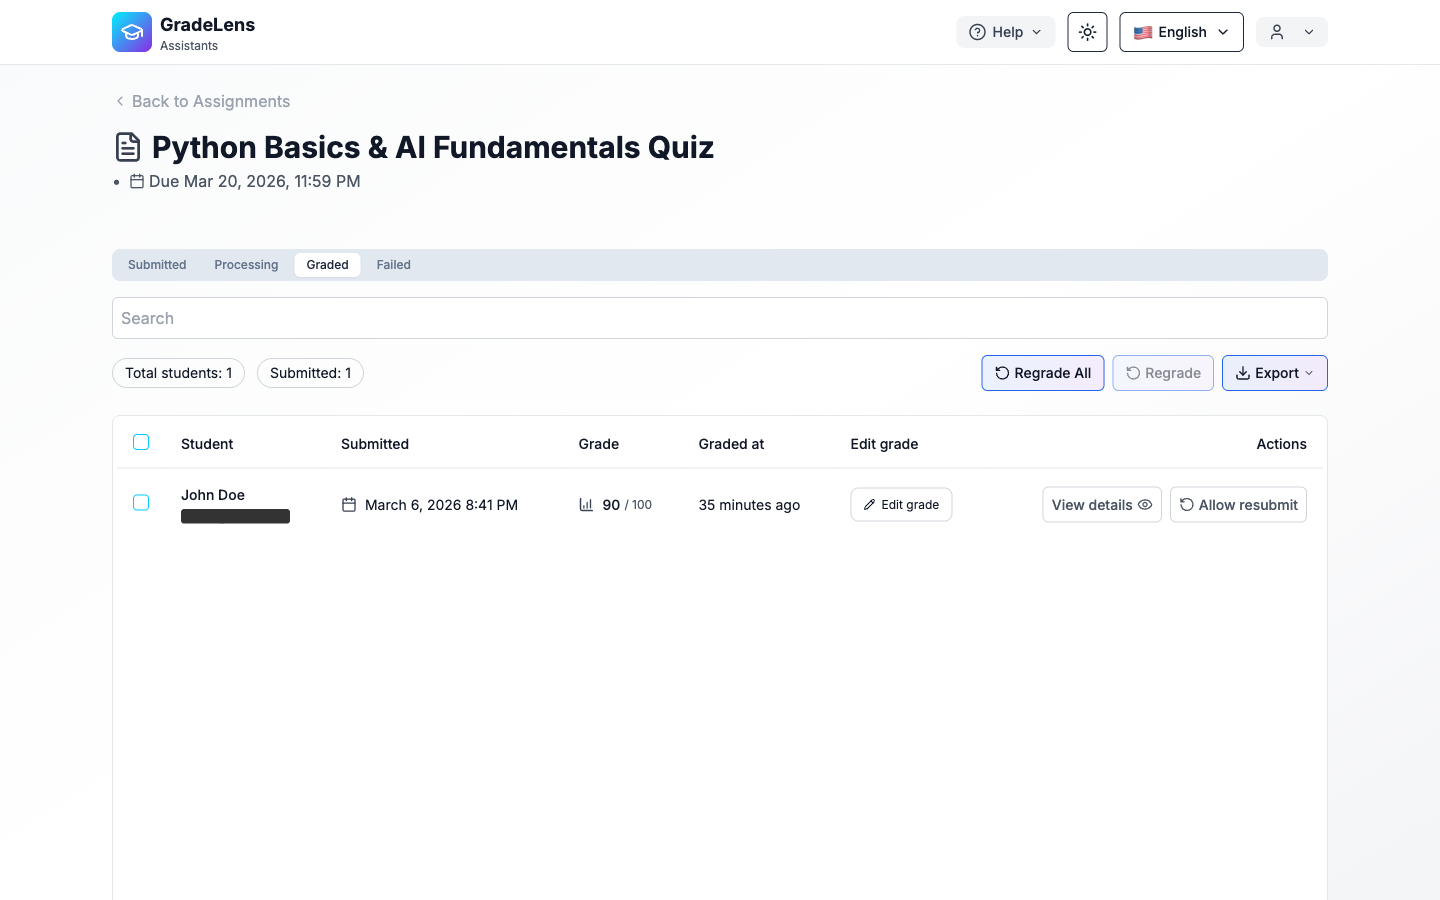
The grading workflow is identical to the Teacher Portal — see Section 3.3 for full details on AI grading, manual grading, and viewing submission details.
5. Student Portal — Checking Assignment Results
After an assignment has been graded by the teacher or AI, students can view their score, per-question feedback, and detailed AI analysis directly from the Student Portal.
5.1 My Classes
Navigate to the Student Portal at gradelensai.com/studentDashboard. The sidebar shows:
| Item | Description |
|---|---|
| Via teacher link | Join a new class using a teacher's invite link |
| My Classes | View all enrolled classes |
| Notifications | System alerts and updates |
| Settings | Manage your profile |
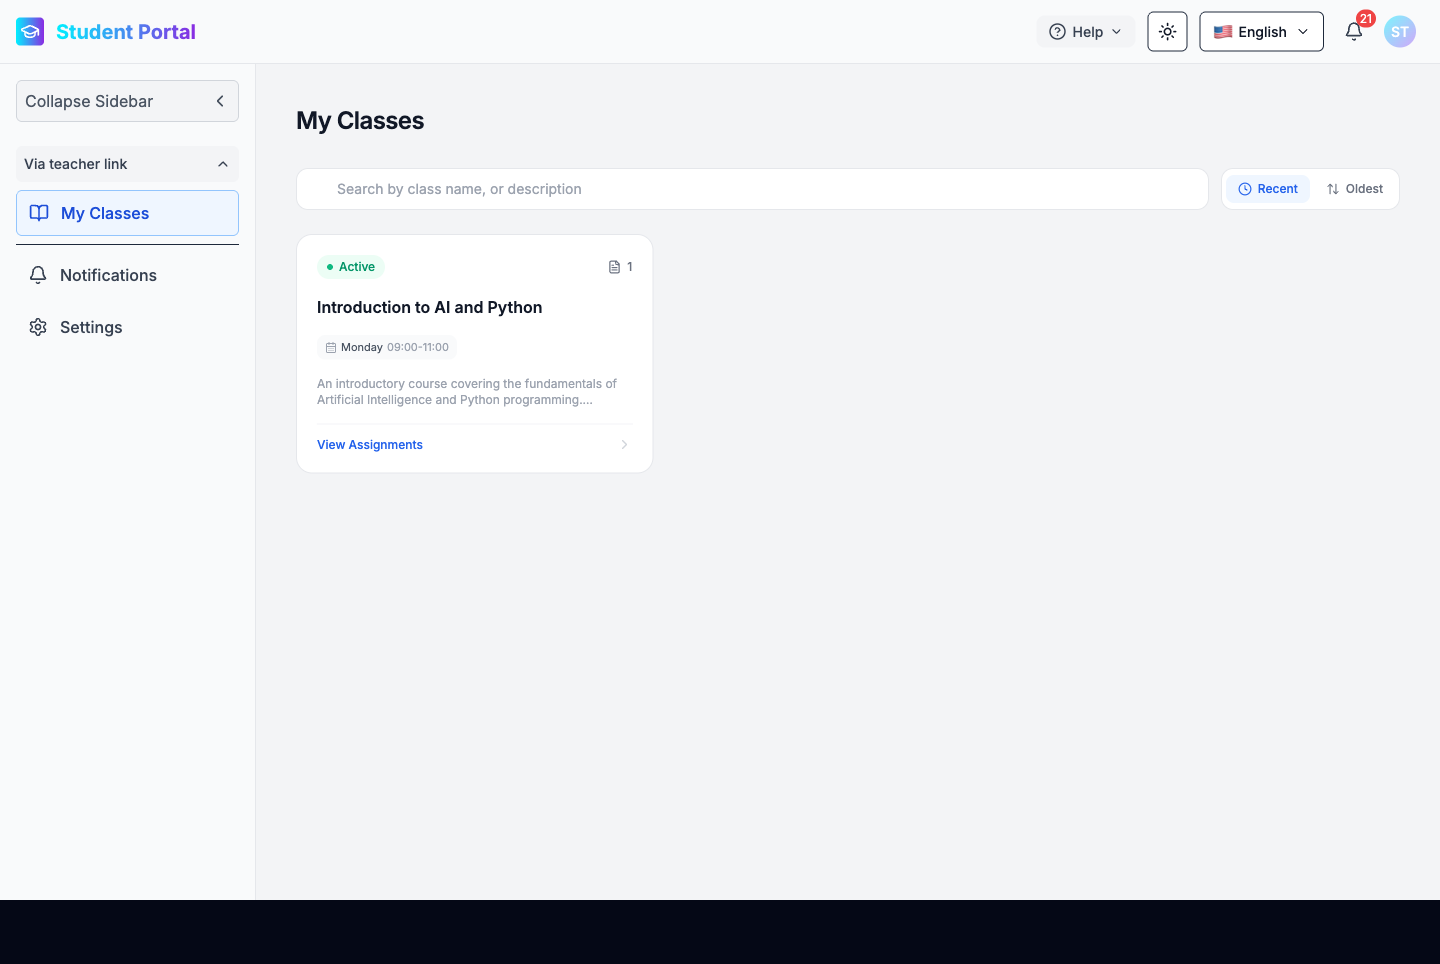
Each class card displays the class name, schedule, description, and a View Assignments button.
5.2 Viewing Assignments — Graded Status
Click View Assignments on any class card to open the assignments list for that class.
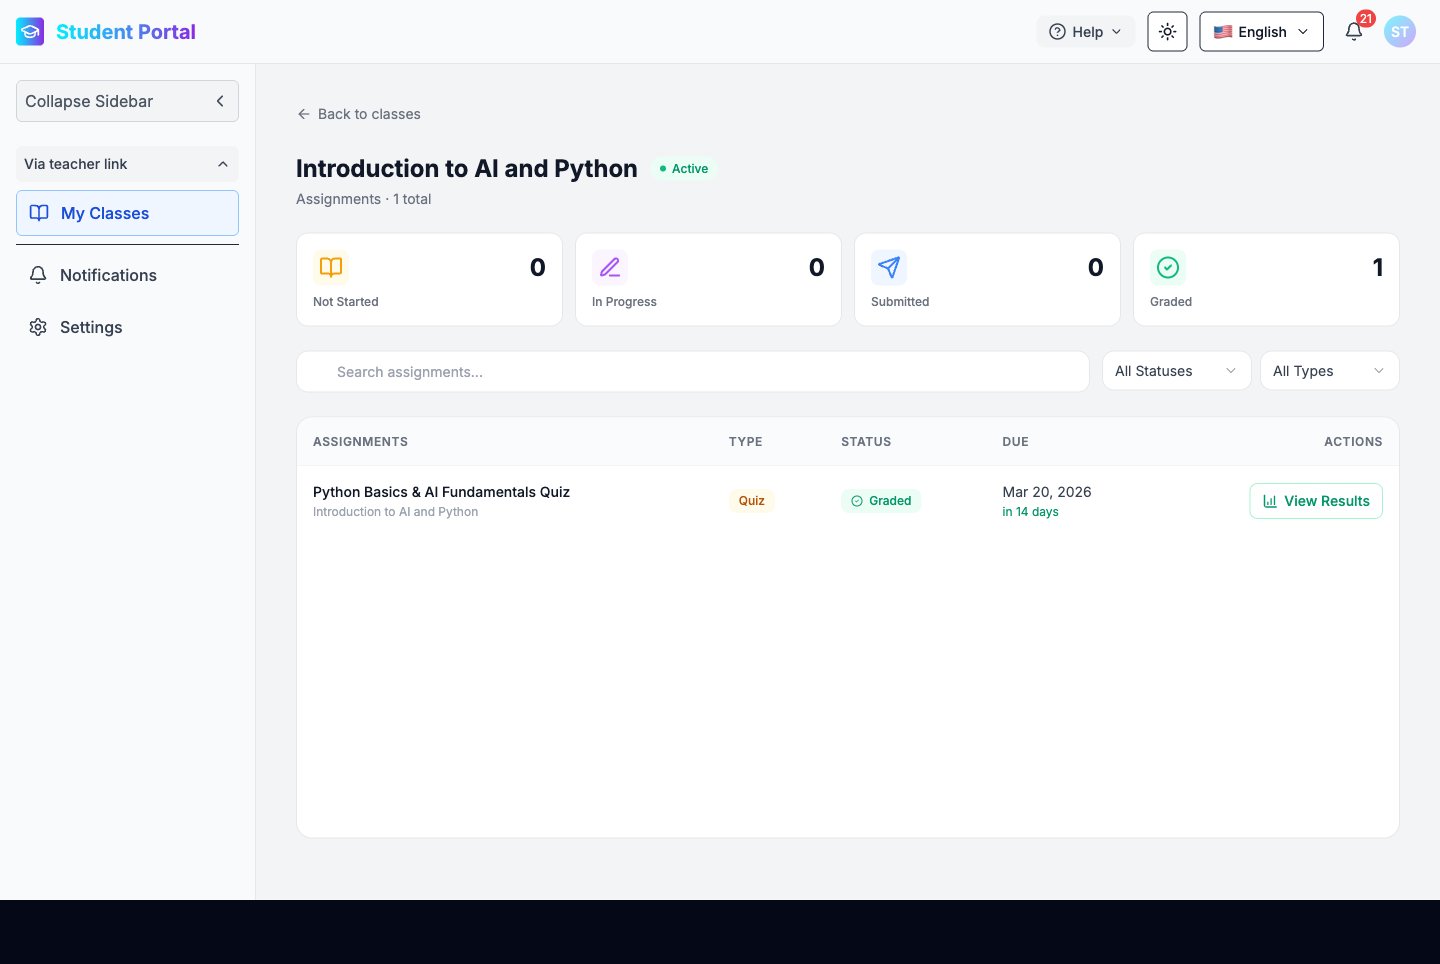
The top of the page shows four status counters:
| Counter | Description |
|---|---|
| Not Started | Assignments you have not opened yet |
| In Progress | Assignments saved as draft |
| Submitted | Assignments submitted but not yet graded |
| Graded | Assignments that have been graded and results are available |
The assignments table shows the Assignment name, Type, Status badge, Due date, and an Actions column. Once an assignment is graded, the status badge turns green (Graded) and a View Results button appears in the Actions column.
5.3 Viewing Results
Click View Results to open the detailed results page.
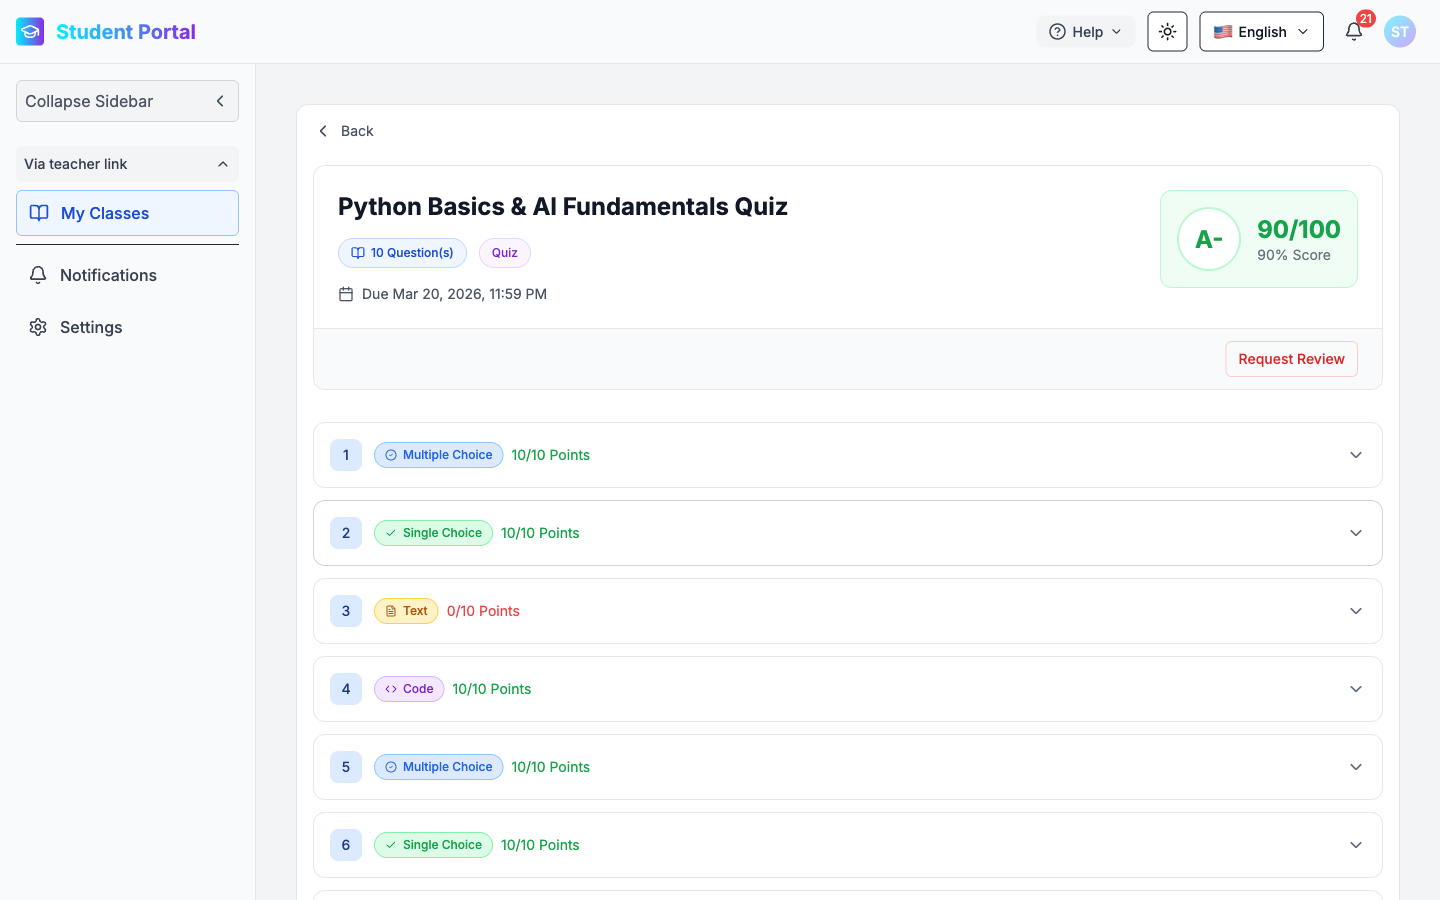
The results page header shows:
- Assignment title, question count, type, and due date
- Score card (top right) — letter grade (e.g., A-), numeric score (90/100), and percentage (90% Score)
- Request Review button — submit a review request if you believe a question was graded incorrectly
Below the header, each question is listed as a collapsible accordion showing the question number, type badge, and points earned.
5.4 Question-by-Question Feedback
Click any question row to expand it and see your full results for that question.

For each question you can see:
- Question text
- Your Answer — your selected choices (highlighted green with ✓ for correct) or your written/code response
- Feedback — a brief summary from the grader
- Grading Criteria (optional) — expandable rubric breakdown
- Detailed AI Feedback (Text and Code questions) — in-depth AI analysis
Missed Questions — AI Guidance
When a question was left unanswered or answered incorrectly, the AI provides remediation:

The Detailed AI Feedback section shows:
- Score summary — e.g., "0/10 points — No answer provided."
- Overall Feedback — a brief explanation of why points were lost
- Areas for Improvement — specific issue, suggestion, and a 💡 Correct Approach showing what an ideal answer would look like
- Student Feedback — a direct personal message (e.g., "❗ No answer was provided…")
Well-Answered Questions — AI Praise
For correctly answered text and code questions, the AI highlights strengths:
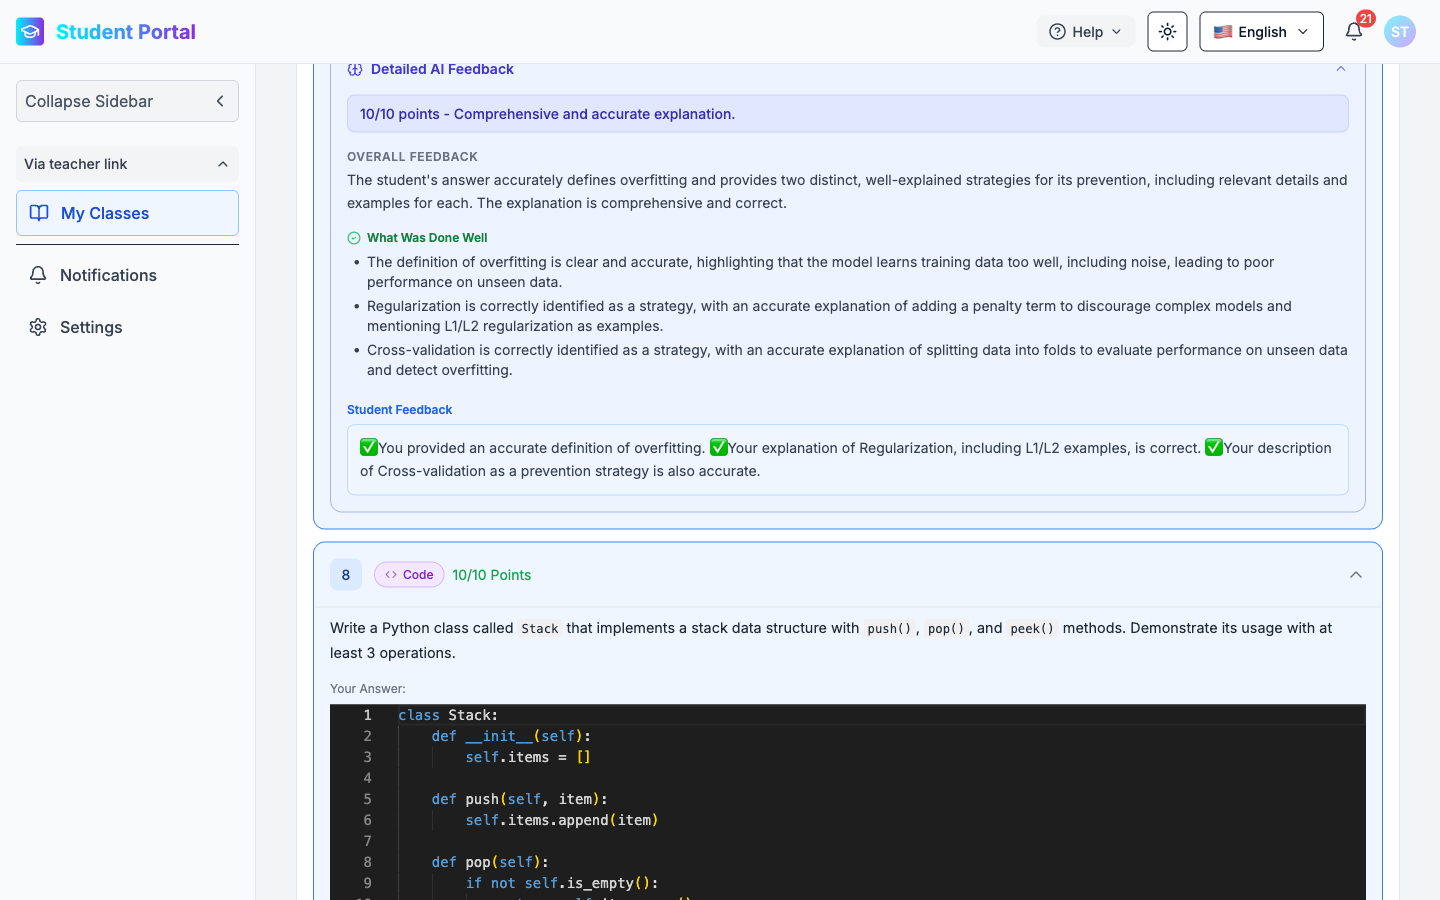
- Score summary — e.g., "10/10 points — Comprehensive and accurate explanation."
- Overall Feedback — confirms the quality of the answer
- What Was Done Well — bullet-point breakdown of each correct element
- Student Feedback — personalised positive confirmation (e.g., "✅ You provided an accurate definition…")
6. Organization & Department Management
GradeLens supports multi-department organizations — universities, schools, or companies can structure their teachers into separate department groups, each with its own classes, assignments, and TAs, all under one shared subscription.
6.1 Overview
An Organization in GradeLens is a teacher account that acts as the top-level owner. From this account you can:
- Create one or more Department Groups (e.g., Computer Science, Mathematics, Physics)
- Invite teachers into each department
- Share the subscription plan's credits and limits across all departments
- Manage all billing centrally from the owner account
Note: Department Groups require a Pro or Enterprise plan. The Free plan supports only one group.
6.2 Creating a Department Group
From the Teacher Portal, navigate to Groups in the sidebar.
Click + Create Group to open the creation dialog.
| Field | Description |
|---|---|
| Group Name | Name of the department (e.g., Computer Science Department) |
| Description | Optional description of the department's purpose or scope |
Click Create Group to confirm. The department card appears with your role as Owner and the member count. Repeat this step to create as many departments as needed.
6.3 Adding Teachers to a Department
Open the department by switching into it via the account switcher, then go to Manage Group.
Click Add Teachers and fill in the invitation form:
| Field | Description |
|---|---|
| Teacher Email | Email address of the teacher to invite |
| Teacher Name (optional) | Display name for the teacher |
Click Add Teachers — an invitation email is sent. The teacher appears under Pending Invites until they accept, then moves to Members.
Teachers can belong to multiple departments. Each department context gives them access to only the classes and assignments within that department.
6.4 Switching Between Departments
Click the account switcher (Personal Account button) in the sidebar to see all your departments in a dropdown.
Select any department to enter its context. The sidebar updates to show that department's Teachers, Manage Group, and Billing pages.
6.5 Managing Department Members
Inside a department, go to Manage Group to:
| Action | How |
|---|---|
| Edit department info | Click Edit Group (top right) |
| Delete the department | Click Delete Group (top right) |
| Resend a pending invite | Click the resend icon next to the invite |
| Cancel a pending invite | Click the cancel icon next to the invite |
| Remove a member | Use the remove action next to an active member |
6.6 Department Billing
Billing is managed centrally by the organization owner. All teachers in all departments consume from the same subscription plan.
To view or change the plan, switch to any department context and go to Billing in the sidebar. Available plans:
| Plan | Price | Key Limits |
|---|---|---|
| Free | $0 /Student/Month | 1 teacher, 1 class, 10 students, 5 assignments |
| Pro | $7 /Student/Month | Unlimited departments, teachers, classes, and assignments |
| Enterprise | $10 /Student/Month | All Pro features + dedicated support and API integration |
Note: Group members (department teachers) do not have access to Billing — only the organization owner manages payments.
Documentation maintained by GradeLens · gradelensai.com